MusicMaster Blog
Flip It: How & Why to Copy an Assignment Grid Publicado por Laurie Knapp en octubre 28th, 2024
By Dave Tyler
We have all been there. After years of programming a station, the decision has been made that you are flipping formats, stunting a format change, or perhaps you are about to enter the Christmas season and really, really don’t want to have to create all brand-new clocks just for 4-5 weeks of programming. Or perhaps you just want to make changes to the clock that won’t go into effect for a couple of weeks and want to work on them without messing with the current grid.
Wouldn’t it be nice if you could copy the current assignment grid and clocks into a new assignment grid populated with newly named clocks that are clones of your current clocks? You could then make adjustments in these clocks and this grid without messing around with your current working clocks and grid. With MusicMaster you can!
It is important to note before moving forward that you can also “Clone” your current database if you were flipping formats and have a safe “Sandbox” version to make your changes in until you are ready to go live. (Here is a link to an article I wrote on that: https://musicmaster.com/?p=6780). Or, you can use the Format Scheduler as another lane to plan ahead for holiday or specialty programming days. For more on using the Format Scheduler, check out this top-notch blog by Senior Technical Support Manager Paul Ziino: https://musicmaster.com/?p=757 .
In my example today, to keep things as straightforward and easy to understand as possible, I will be copying my grid so I can program my Christmas music. But keep in mind, there are multiple reasons why you might want to do this. In my example below, you can see my Christmas categories and my current grid using my normal categories for regular programming.

There are 14 unique clocks in this grid that I use on a weekly basis for my regular scheduling. If I start making changes that will only be used temporarily, then I will need to note those changes, so I don’t miss anything when I return to regular scheduling. In my opinion, this is like laying landmines for myself. I don’t know about you, but when I’m falling asleep, I have some of my best ideas as my mind relaxes. I have learned that 99% of the time when I convince myself I will remember this earth-shaking idea in the morning, I completely forget it. I used to keep a pad of paper by the bed, but now I just speak the idea into “Memos” on my phone. So, the idea that I will either recall the changes or even remember where I put my notes on the changes is a risk I am not comfortable with.
So, I have decided in this case I would love to copy the entire grid to a new grid that I can work on. But hold on a second, I would still need to make new clock names right? Yep, but MusicMaster has that handled. After clicking on my Clock icon on the toolbar to pull up my Format Clock Maintenance window, I can choose to “Copy” my assignment grid. Because I also need new clocks, I can check that box too. But wait there’s more!!!! I can choose a character I would like these new clocks to be prefaced with. In my example, I am using the letter “X” for all my Christmas clocks.

Look what happens when I click OK.

I have a new Christmas grid filled with the same clocks as my regular grid, but I can now adjust and manipulate them for my new/upcoming programming needs. I can double-click on a clock and begin making the necessary changes, and once complete, I can make this grid active when needed and hit the ground running.
There are a lot of reasons why you may find this a useful tool. I find that because I use lognotes and time syncs and special elements in my database, recreating those for a full grid can not only be exhausting, but it is easy to miss something. If I know my grid is solid and works well week in and week out, then that is some solid footing to use as my foundation for adding changes.
I realize some of you may have a huge amount of clocks, and you might not even know if you need them all. Doing some housekeeping on clocks and grids can be a great move too, and I would advise checking out this incredibly complete blog on how to do that written by my colleague Vicky James: https://musicmaster.com/?p=8665 .
As always, if you have any questions, MusicMaster support is here to help.
Always Be a Student Publicado por Laurie Knapp en septiembre 23rd, 2024
by Dave Tyler
One of the greatest bits of wisdom I’ve ever been given was to never stop learning, but it really goes further than that. The key is to always be a student. Those two things may sound like they are the same, but they are not. One just means to keep looking for knowledge, while the other means to humble yourself – to learn not just the information, but the how, who and why. To give up the ego that wants to say, “Yeah, I already know but…” or “Yeah, I know that part…can we move faster?”
I had some great teachers who taught me patience, the importance of granular details, and the power of disciplined practice and effort. Mike Tyson was a great fighter because he did all of the little things – the fundamentals – at a master level. Just as a house built on sand will surely fall, the foundation your skills are built on is either the strongest or weakest part of the system.
As a former Navy man in Korea, my father was a solid disciplinarian. When he did things, he always did them “right”. I have joked over the years, but it is 100% true that my dad would tell me, as a six-year-old, to dig a 1 x 1 foot square hole. This meant 12 inches wide and long, and 12 inches deep. Edges were to be straight; you could take a ruler, and it would be true on each side.
In my later teen years, I got a part-time job digging holes for a company that installed in-ground Jacuzzis. I had to learn the dimensions of each model because the fit had to be good. If there was space between the ground and the base, then someone could step too hard and punch through it. They dropped me at my first dig, and when they came back several hours later, the owner and my supervisor started laughing. I thought I was in trouble, but I wasn’t! They said, “We could plumb that hole and it would work because you formed a perfect Jacuzzi in the dirt!”
I was not a great student in school. Learning was difficult for me, and it continued to be until I was about 20 years old. I struggled to slow my brain down enough to focus on a subject for an extended period. Things started to change at the age of 16 or 17. At about the same time I got my first part-time job in radio, I enrolled in Karate classes. I loved the physicality of it, but there were kata (forms) to learn and lots of Japanese terminology that I had never heard before. In martial arts, you cannot move forward unless you reach a certain level of proficiency. After a little more than three years, I tested for and passed my black belt test in an art called Shinote. I recall being exhausted, absolutely spent but excited. I received my certificate and belt and then my instructor kicked me out of his school!!!
It wasn’t quite that aggressive, but he explained that the first requirement to begin moving towards my 2nd-degree black belt was to leave his school and go get a 1st-degree black belt in a completely different martial art. I could still practice Shinote of course, and did weekly, but I had to go start to study another art. I enrolled at a Ji Do Kwan Tae Kwon Do school and after about 2 ½ years, I got my 1st degree black belt in that, and was able to resume my progress in Shinote.
Over 40 years I’ve spent in the martial arts, I have been able to earn my 5th-degree black belt in karate, 4th-degree black belt in Kobduo (Okinawan weapons), 3rd-degree black belt in Goshin-Budo Jujitsu, and 2nd-degree black belt in Tae Kwon Do as well as a Brown belt in iaido (Japanse sword drawing).
I trained in Kobudo (Okinawan Weapons) many times with the late Kiyoshi Yamazaki of Japan. I even had the honor of him asking me to lead a Gashuku (intense training) class of high-ranking black belt instructors for Bo (Staff) & Tonfa. This pic below includes my instructor Ricky Adams as well. Yamazaki was a national treasure of Japan and was even the man who taught Arnold Schwarzenegger how to use a sword in the Conan movies.

This is a picture of my young son (he’s now 34) when we trained small circle jujutsu with the legendary Wally Jay. Jay taught Bruce Lee jujutsu.

The picture below also includes some legends. I am in the black gi at the very back 2nd from left (next to the big guy in the white gi). Back when I had actual hair! The two instructors in white at the front are Takashi Kinjo (honored as a living treasure of Japan by the emperor!) and Mikio Nishiuchi. We were training in a style of weapons known as Matayoshi Kobudo that featured Bo, Tonfa, Sai, Nunchaku & Kama (twin scythe type weapon).

Not to mention, this kid with a learning problem has also written more than a dozen historical articles on the martial arts for magazines like Black Belt, Karate International, and Inside Karate. I say none of this to pat myself on the back, but the key was the desire to always be a student and to learn for the knowledge, not for rank or prestige.
I know I’ve made the eyes of my family roll every time we would go on vacation because if there was a dojo (school) in the town that taught something I had no experience with, I would call them and see if I could visit and train. Almost all said yes, and even with my higher ranking, I would wrap a white belt around my waist as a show of respect. I was not there to show them how much I know, but to hopefully learn a little of what they know. Such is the tradition in karate. Most often the instructor will thank you and demand you put on your black belt out of mutual respect.
My well-work black belt is pictured below:

My radio career started about the same time, and I was in a similar position of knowing nothing but being excited, and I took this “Student” mentality to work with me. I was/am never afraid to ask the stupid question or to admit that I do not know something…even if I probably should know it. I pestered every radio person who had so much as a day’s more experience than me for information on how to talk right, how to develop from being an announcer to being a personality, how to splice tape (a skill I no longer need LOL), how to do digital editing, how and why music is scheduled the way it is, how to put together promotions…you name it. I attended every Dan O’Day Morning Show Boot Camp I could afford to go to and had an impressive collection of California Aircheck cassettes of my radio heroes, of which I listened to figure out what made them so relatable, so great.
In 2014, with a tad more than 30 years of radio experience, I was offered my position here at MusicMaster! Wow! I knew this was an elite team, but I had no idea just how bright and talented everyone here was. After 30 years as a morning guy, Music Director, Program Director, and Ops Manager, I was going into a new world. It took me about one week as a three-decade radio pro to realize it was time to put my white belt back on, shut up, listen, and learn. Many of those instructing me were much younger than me, but they knew this software like the back of their hand. Ask anyone senior or junior to me at MusicMaster and they’ll tell you I am not scared to admit when I need more info on a topic. I ask, ask, ask. I have a folder on my laptop called “Cheat Sheets”. This folder has countless screenshots and step-by-step instructions on areas where I might have or still struggle, and I add to it constantly.
In this age of radio, we need to not only be good at what we do on the air, but each of us will wear many hats in the halls of a radio station. We need to be really, really good on the air, at writing scripts, voicing production, live appearances, creating promotions, and of course scheduling our music. Every song is an opportunity for the listener to make the choice to stay or leave. We are being tested every 3 ½ minutes by the folks that can make or break us.
Our Music has to be stellar. Jukebox radio just doesn’t cut it, and as we move forward, I think local radio will actually cycle back around to being the big player because we know our markets better than anyone else. Music tastes are different regionally. Music Scheduling is like being a chef. You can’t just throw a bunch of things together and make it taste good (unless you’re in New Orleans…they can throw anything in a pot and make it taste amazing), you need to tweak the details to make somebody’s eyes widen when they take a bite. I remember the first time I tried legit Mexican Street Corn in Dallas…I was like “What in the world is this flavor”? Experiencing something fresh and new is memorable and exhilarating! Keep the sound of your station exciting. MusicMaster has everything you need to do it. The days of being a specialist like just a Music Director or only a Production Director and not also doing a shift are long gone in most cases. Your team at MusicMaster is always ready to teach you more about this wonderful, powerful, robust software.
No matter how much experience or what position(s) you hold/held, if you to continue to secure your place in today’s radio environment, you need to be a master in many areas. Where can you learn more? I mentioned earlier those morning show bootcamps. These were great learning places. If you haven’t, start to attend radio conferences locally and nationally. My love is Country music and as much as my butt has sat on a lot of barstools during the annual Country Radio Seminar, I also attended a ton of great panels to learn more about particular subjects, or to listen in on someone’s take on how they do their job at such a high level. From CRS to the big and regional NAB shows, CMB, NRB, Conclave, and more, these are fertile grounds for sharing and learning new things.
One thing I started doing early on was reaching out to my heroes and people that I thought had a unique take and asking them for more information. At my first AM radio job in Inverness, Florida, I would write and send aircheck tapes of myself to South Florida radio legend Rick Shaw. Rick responded EVERY time! He would send me two-page letters with a critique of the tapes and answers to questions I asked him. Reach out to people you admire with the questions you have, and you will be surprised that most of them would love to share with you.
Check out websites like Radio Ink, Inside Radio, and others. Facebook has tons of radio “Groups”. One of my favorite groups is Radio Broadcasting Industry. Join and ask questions. If you have a consultant…ask them questions. You are paying them for their knowledge, and I bet they’ll be more than happy to pass some on. Never be afraid to ask your peers. Everyone has experienced different things that led them to you. 20+ years ago, consultant Mike McVay came and visited the station I was working at because he was buddies with our Ops Manager, Shane Finch. We took him to lunch, and he probably had to get a big takeout bag because we all asked him a thousand questions and he took his time to answer each one… stuff that is part of my programming philosophy to this day!
And let’s not forget the massive resources offered at MusicMaster. Our website (MusicMaster.com) features a “Learn” section with Webinars, Walkthroughs, and hundreds of blog articles on just about every topic or question you could have about scheduling music. These blogs are often step-by-step “How-To’s” with screenshots to help get things set up right away.
However, the biggest resource you have is your MusicMaster Support rep. I spend my days speaking with clients of all levels about their music, how to do things, how to get better rotations, how best to code songs, etc. It is a dream job! We’re in this thing together to make great radio, get great ratings, and drive listenership and sales. When you win, we win. MusicMaster is a robust software package with tools inside to supercharge what you’re already doing. Use this to your advantage. Ask. Learn. Succeed. Lead.
Favored and Disallowed Patterns Publicado por Laurie Knapp en septiembre 23rd, 2024
by Paul Ziino
We see a lot of databases every week, and frequently, we see folks using the rules of Favored Patterns or Disallowed Patterns, but they are set up incorrectly. So today, we’ll discuss how to set those rules up and why, as well as when not to use these rules.
The Disallowed Pattern rule allows you to set a maximum of 16 patterns for a given attribute field, each up to 8 codes in sequence, that you will not tolerate. The rule is available for Attribute-Overall, Attribute-Combo, and Attribute-Multiple fields.
In the following example, we have codes 1=Ugh, 3=OK, and 5=Yay for our Mood field. We can also use code ‘?’ as a wild card. If we set a pattern of 1??1, that means we cannot have a 1 code followed by any two other codes and then another 1 code in the field. Our second disallowed pattern is 33333 which means we will not allow five Mood 3 songs in a row. And the third pattern listed of 555 prevents MusicMaster from playing three Mood 5 songs in a row. I’ve also indicated we should not include non-music items in our test of Mood – Disallowed Pattern.

The rule is tested constantly throughout the scheduling process. So wherever there is a Mood 1 song being considered, MusicMaster will look back and ahead to make sure we will not run into the disallowed pattern. Wherever there is a 3 code being considered, MusicMaster will look back and ahead to make sure we have no situation where there’d be five of that code in a row.
A common mistake we see is codes separated by commas. 1,?,?,1. This will only work if you have a comma used as a code in the field and you’re trying to prevent that code from playing in between every song. 3,3,3,3,3 will not work, nor would 5,5,5…again, unless comma is a code you’re using in the field.

Please note, only the patterns listed in the Disallowed Patterns rule will be forbidden. Any other pattern is allowed. You can only list 16 patterns max. We have seen folks use the rule multiple times with different patterns in each. The problem with this is that any pattern not listed in the first rule violates the second one. And any pattern not listed in the second will violate the first.
This all works the same way in Favored Patterns. You can create up to 16 patterns, each up to 8 codes in sequence, that MusicMaster must obey. Please note, with Favored Patterns, only those patterns listed will be tolerated. Any pattern that doesn’t show up in your list will be considered a failure. And the same goes for using a comma (or any other character) in between the codes… Don’t do it.
In the following example, we will allow a 1 code to play followed by five wildcards then another 1 code. We’ll also allow four 3s in a row followed by a 1 or four 3s followed by a 5. And we’ll allow two 5s in a row followed by a 1, or two 5s in a row followed by a 3, but no other patterns are allowed.

We mentioned that only those patterns in the Favored Pattern rule will be allowed and only those patterns in the Disallowed Pattern rule will be considered violations. As such, it would be counter-productive to use both rules in your rule tree together. This is because any pattern that passes the Favored Pattern rule will fail the Disallowed Pattern rule.
At the start of this article, I mentioned I’d explain when not to use these rules. The answer is that there is often another rule that can do the same job. For example, if you set up a Disallowed Pattern indicating 555 is not allowed, we could also turn on a rule for Mood 5, Max in Sequence of 2.

That gives you the same result as a disallowed pattern of 555.
The Disallowed Pattern of 1??1 can be accomplished with a Max in Sequence rule of 1, separated by 2.

Why do I prefer the maximum in sequence rules? Because should it be broken, we will know exactly what rule is in violation. Allow me to explain.
Let’s say I have 16 Disallowed Patterns set up in my rule and I’m editing my log, and I see a song violates the Disallowed Patterns rule. I don’t know which of the 16 patterns that song is failing. But if I use the Max in Sequence rules, the Editor will tell me exactly what rule is in violation.
By no means am I telling you not to use Disallowed Patterns or Favored Patterns rules, I’m just telling you why I prefer to use the others.
Sometimes there is no other way to get the desired result. If you always want MusicMaster to follow a certain pattern, then Favored Patterns is the way to go.

I can’t create any other rule that would give me the results of the patterns listed above.
Thinking of using a Pattern rule in your database? Give your MusicMaster Scheduling Consultant a call and they’ll help you figure out the best way to do so!
Helpful Reports from the History Browser Publicado por Laurie Knapp en agosto 27th, 2024
by Vicky James
The History Browser is a great way to view a recap of the songs, categories or elements that have been aired. But did you know you can also copy the report data, save your favorite report designs, and print the results? Let’s look at an example: generating a report to see how often a specific promo aired last week.
To find the History Browser go to Dataset > History Browser or click its icon on the main toolbar.
I want to generate a simple report configured to display the number of spins each day of the promo for Colin’s Candy Store.
To start, set the configurations for each tab. I chose the dates I wanted to look back at, and kept all hours included. Under Categories, I selected my Promo category. I also have the option to use a Filter, so I can just see the results for the Colin’s Candy Store promo. That looks like this:

I also set the Display mode to “Individual Plays” so I will get a list showing each individual time the promo aired.

Next, the analysis will be compiled and generate the recap report as displayed here:

Here, I can not only see the total spins for the week, but also each time each promo was aired.
If you want a more in-depth breakdown, you can adjust to display more options using the menu in the bottom left corner.

Finally, you can Copy the data from the displayed list and paste it into a spreadsheet program, or you can print the report from MusicMaster. You can also save the report configurations to your Favorites, should you want to run the same analysis again in the future.

Traveling for the Love of Music Part 3: Sinéad O’Connor and Shane MacGowan Tribute at Carnegie Hall Publicado por Laurie Knapp en agosto 27th, 2024
By Brian Wheeler
I’m not singing for the future
I’m not dreaming of the past
I’m not talking of the first times
I never think about the last
-Shane MacGowan
It’s time for the third installment of Traveling for the Love of Music. I feel like I need to share a bit of background to bring you up to where I was when I embarked on my most recent experience.
I grew up in a sleepy farm town in rural Minnesota, 75 miles outside of the Twin Cities. The town itself is less than a square mile in size, and the population at the time was under 600. A two-lane highway ran through the town, splitting the town into not quite equal halves. At one time I was the paper boy for the whole town, it’s that small. Everyone knew everyone, which was a blessing and a curse. Not much entertainment was to be had in a town that small, so you had to make your own fun. When I wasn’t outside hanging out with friends, I was spending time listening to the radio, trying to tune in stations in the Twin Cities metro and beyond with the AM/FM/short wave/cassette radio I got for Christmas one year. This opened a whole new world for me, as I could hear broadcasts from far-reaching places. My friends and I had also started making mix tapes.
I personally had precious little in the way of source material for mix tapes. Truth be told, I spent more time making mock-up radio shows, doing ‘interviews’, creating spoof commercials, and recording the radio broadcasts I could tune in. But I had friends who had other friends, and those friends had access to a musical world that was foreign to me. In my little corner of the world, the only place you could buy music was a gas station on the edge of town that had a spinning display of 25-30 dusty and overpriced cassettes. The selection consisted of stale country artists and the occasional outdated pop star. The town a few miles down the road had a Pamida (a department store akin to K-Mart) and their selection was bigger, but equally bland. I was starved for something more.
It was the 80s, which was a great decade for music. Through my friends, I was introduced to R.E.M., The Talking Heads, The Sex Pistols, The Clash, and The Replacements. I got to know The Cure, The Pogues, The Smiths, Siouxsie and The Banshees, Violent Femmes, They Might Be Giants…I could go on and on. The more music I consumed, the more I wanted to consume. I became a seeker of this previously unknown world of ideas and sound. I owe my friends a debt of gratitude for sharing this gift of music.
Right after high school, I’d end up going to Brown Institute in Minneapolis. I welcomed the new environment, not only because I could finally work toward my dream of a career in radio, but I could slake my thirst for music at some truly legendary record shops. Northern Lights, Oarfolkjokeopus, The Electric Fetus, Let It Be Records, and Cheapo Records became favorite places to deplete any expendable income. All three of my roommates and I would frequent these locations to add to our meager yet growing collections. Wedged into the cramped two-bedroom apartment in South Minneapolis, music was our common bond. We remain in contact with each other to this day.
Earlier this year, I received a call from my good friend Mike Gaffey, one of my three aforementioned roommates. He’d had a pretty rough year, and we’d talked about what was troubling him from time to time as he navigated some difficult waters. He started off this conversation with a declaration.
“Hey…I really need to just do something. I need to go somewhere. You’re the first person I could think of that would possibly do this.”
“Okay. What’s your idea?”
“I want to go to New York City. I want to see the Sinéad O’Connor and Shane MacGowan Tribute.”
I’d already thought about trying to see this show myself. Both Sinéad and Shane MacGowan (by virtue of his work with The Pogues) had been two artists that impacted me greatly in my youth. They both had died recently and within months of each other. Both losses were quite difficult for me. They were both staunch and unapologetic in their beliefs and weren’t afraid to wear their hearts on their sleeves in life or in their music. I admired them for that and still enjoy their art to this day. Mike felt the same way about them, and I believe he felt attending the event would serve as a sort of therapy.
We secured tickets, flight, and hotel and endured only a few weeks of anticipation before we’d set foot in The Big Apple, ready to see what the city could show us in 72 hours. Since we were both hockey fans and had fond memories of sitting in the nosebleeds for North Stars games, we decided to take in a New York Rangers game. The Rangers played the Winnipeg Jets that night, which I incorrectly predicted would be a preview of the Stanley Cup Finals this year. It was a competitive game nonetheless, and between the on-ice action and Mike’s comedic prowess, a memorable time was had during our first visit to the mighty Madison Square Garden.

The next day we decided to head to the Lower East Side to take in the majesty of Katz’s Deli. A place like Katz’s doesn’t need my endorsement. They’ve been feeding New Yorkers since 1888 and are officially New York’s oldest deli.
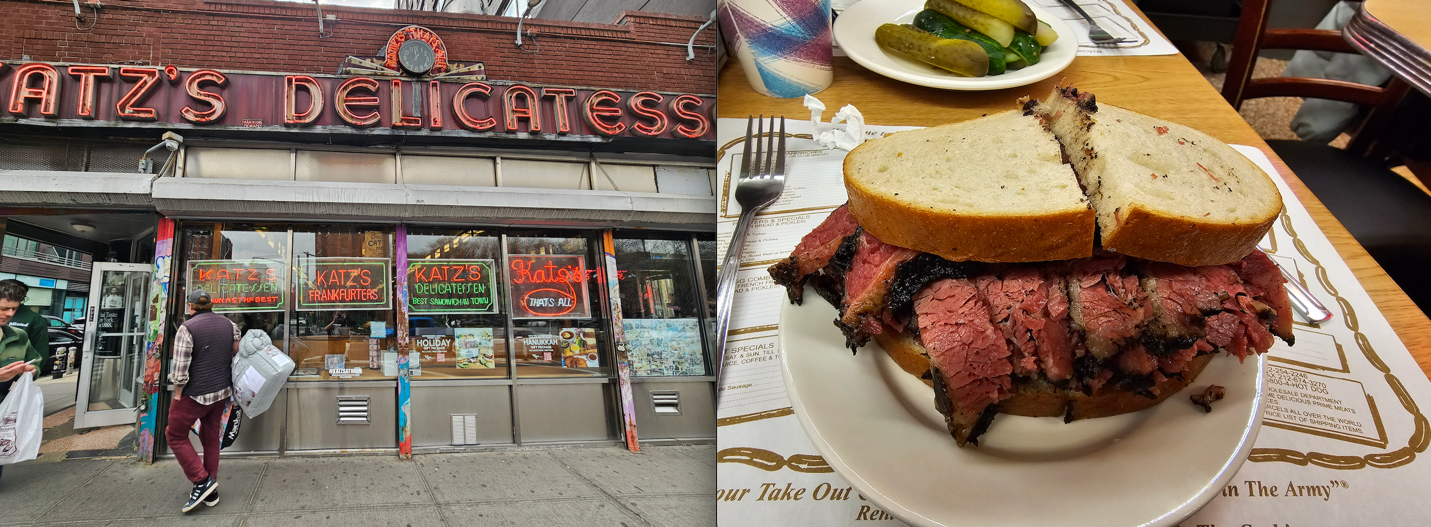
Having stuffed ourselves with glistening stacks of pastrami, we decided to wander the neighborhood. We stumbled upon the Tenement Museum, a museum that is dedicated to preservation of the historic Lower East Side tenements that housed countless immigrants looking for a better life. We took a tour, and it was as though we were transported back into the formative years of the city. The neighborhood’s history is rich, and their story is critical to the fabric of the city. It was a fascinating glimpse into the past. After the tour, we wandered some more and found the corner of Ludlow and Rivington which is now known as Beastie Boys Square. The corner is featured prominently on the cover of their ‘89 release, Paul’s Boutique.

Back in Midtown Manhattan, the moment we’d waited for had finally arrived. We walked into Carnegie Hall as doors opened for the evening so we could take in the venue. Carnegie Hall is such a majestic building. The architecture is stately and not stale, and the walls decorated with portraits of myriad past performers tell a deeper story.
The halls bustled in quiet anticipation of the evening’s events. Mike and I had seats in the first balcony which gave us a bird’s eye view of the stage. Unfortunately for Mike, these balconies were built at a time in history when people were generally a bit smaller than we are today. Mike’s six-foot-nine frame had to wedge into the small seat assigned to him. He didn’t seem bothered by this and when I asked him about it, he said he was used to it. Settled in, we awaited the start of the show.

The lineup of artists that had gathered to pay tribute was impressive by name but would prove to be even more impressive by virtue of their performances. I’ll share with you the highlights, but honestly the whole show was incredible. There were a handful of musicians that remained on stage to accompany each of the performers as a backing band. The numbers performed would alternate between Sinéad’s and Shane’s catalog. The performances themselves were an emotional rollercoaster, with each performer bringing their own flavor to their respective tributes.
The evening began with a solo bagpipe performer that walked from the back of the main floor to the stage while playing a mournful tune called “The Foggy Dew”. Then a trio comprised of Joy Askew, Amy Cervini, and Kat Edmonson sang “In This Heart”, a Sinéad O’Connor song. The sound filled the room, and I now knew the power of Carnegie Hall, as the music swelled to fill the space. Then, a solemn Gordon Gano of the Violent Femmes took the stage, acoustic guitar in hand. He played “A Pair of Brown Eyes”, a familiar favorite from The Pogues. I was already tearing up and we’d barely begun the evening.
Cait O’Riordan, the former Pogues bassist, had taken up her position on stage at this point and Steve Earle stepped up to the mic and performed a rollicking version of “If I Should Fall From Grace With God”, which got the audience dancing and howling. The P.A. announcer predicted during the introduction that this may be the first mosh pit in Carnegie Hall history. The mosh pit didn’t form, but the energy in the room made up for it.
While I didn’t personally know every performer, it became evident why each performer was present to participate in the tribute that evening. A constant thread that carried throughout the evening was reverence for both artists and what they represented. Sinéad O’Connor was known as an advocate for causes held dear to her, and many of the selections reflected her fight for social justice. Amanda Palmer of The Dresden Dolls performed “Black Boys on Mopeds”, a song referencing a young man that was murdered by British police over a falsely presumed moped theft. Her rendition was captivating and reminded me of why I was drawn to her vocals years ago.
A man who is no stranger to activism, Billy Bragg, took the stage and performed “A Rainy Night in Soho”. Again, goosebumps and that now familiar knot in my throat as he sang the lyric “You’re the measure of my dreams”. Bettye Lavette’s a cappella performance of “I Do Not Want What I Haven’t Got” had the audience hanging on every note. Cat Power brought her lyric sheet out and delivered “Feel So Different”, and rousing performances from Flogging Molly, Dropkick Murphys (pictured below), and Eugene Hutz from Gogol Bordello peppered the evening with their frantic energy. Glen Hansard, Imelda May, David Gray, and a number of other talented individuals graced the stage throughout the evening. I felt extremely fortunate to have witnessed such a collaboration in celebrating the lives and work of two artists that had touched mine and so many others’ lives with their music.

Toward the end of the evening Roisin Waters, the daughter of Sinéad O’Connor, took the stage to warm applause (pictured below). When she began to sing the Prince-penned song “Nothing Compares 2 U”, you could hear her mother’s voice emerge from her throat with every word. Her voice left the audience rapt. During the instrumental bridge leading up to the final verse, a gentle applause reached out to hold Roisin as she stood there under the spotlight, awash in love for her and her departed mother.

Waterworks continued to flow as Glen Hansard returned to the stage with Cait O’Riordan to perform “Fairytale of New York”, which of course became a cathartic sing-along. The only thing missing was Shane MacGowan’s impish grin and a pint of beer.

A rousing ovation concluded that number and summoned the entire roster of artists that had performed that evening. “Dirty Old Town” closed the performance, with nearly all the artists taking turns on a verse at the microphone. If there’s one thing the Irish have perfected, it’s the catchy sing-along. Many in the audience were in full-throat, belting out the refrain as the performers hugged each other and swayed back and forth. It was a beautiful ending to a magical night.
The whirlwind trip had now come to an end. The chilly March wind didn’t seem quite so chilly as we walked back to the hotel, recounting the evening’s events as well as reminiscing on how the music we’d just enjoyed was abundantly seasoned within our life’s mix tape. We were both grateful for that, and grateful that we were able to experience such a heartfelt and cathartic event. It was an experience I’ll never forget.
MusicMaster CS for the Student Classroom Publicado por Laurie Knapp en julio 30th, 2024
by Jesus Rodriguez
MusicMaster is used in many classrooms around the world, ranging from high schools, college, universities, trade schools, and internal company training centers. While MusicMaster, regardless of which edition, can assist with many standard features from our legacy products, MusicMaster Client-Server (CS) can give a classroom a significant edge not only for competitive purposes but also for a professor and student workflow.
In this blog, I will explore the numerous advantages of using MusicMaster CS in an educational setting. This software is not just a tool for the classroom; it can also be a valuable resource during school holiday breaks, allowing students to continue their musical exploration even when they’re not on campus.
Shared Enterprise Library
The first advantage of MusicMaster CS is its Enterprise Library, a feature that simplifies the management of your students’ music collections. This tool allows you to effortlessly collect and maintain all of your students’ music over the years, making it readily available for future students. Say goodbye to the hassle of manually organizing and updating your music database.
Automated Tasks
With MusicMaster CS, scheduling music becomes a breeze. The software’s automated tasks feature is particularly beneficial during student and staff holiday breaks. Imagine the peace of mind of not having to work ahead or worry about the station being off the air. With MusicMaster CS, your automated tasks can handle these responsibilities daily, weekly, monthly, or any other period you select. There are also automated tasks for exporting the logs to automation in your absence, saving you valuable time and effort.
Easy Access
No more classroom labs! With MusicMaster CS, you no longer have to worry about having campus space available for a computer lab should you decide to use MusicMaster in the classroom for assignments or group projects as part of your teaching. With our previous version and other software, the station database is usually installed on a shared computer for all the students to access. The MusicMaster CS client application can be installed on any of your student’s computers using an IP directory to access the MusicMaster CS server.
User Roles and Security
With MusicMaster CS, a unique login can be created for each student, and roles assigned to only allowed to access specific stations, with permission to do specific tasks at any given station, like scheduling, adding music, and changing rules or clocks. The possibilities are endless. Once that student moves on and graduates, there is no longer a concern of retrieving a station database before they leave for the real world because it all lives in your MusicMaster CS server, and their access can be eliminated upon graduation.
More Collaboration
MusicMaster CS empowers students in group or individual projects. As the lead professor, you can create a super administrator role, giving yourself access to your students’ stations. This eliminates the need to hunt down assignments, as you can see their progress over time. You can even adjust students’ access to clocks if a clock assignment is due by Friday, ensuring timely submissions. Group projects are made easier as students can all work on the same station project simultaneously, fostering collaboration and engagement. This is especially convenient when using the MusicMaster CS client remotely. Students can share things like clocks, shows, music libraries, and much more between their station collaborations, just like in the real world.
Web Version
Our new Web Client, which was revealed at the 2024 NAB, will allow your students to access their stations from just about any web browser by pointing to your MusicMaster CS IP directory. The Web Client will allow users to complete any standard daily task from anywhere.

Instructor Notifications
As the instructor, you can also set up notifications to alert you when certain tasks have been completed by your students. This will free up your time for other things and eliminate the need to check to see if projects have been completed.
These are only some of the exciting advantages for your classrooms.
If you’d like to incorporate MusicMaster CS into your teaching environment, contact our sales department to request a demo.
MusicMaster Pro 8.0.14 Publicado por Scott Wirt en julio 22nd, 2024
MusicMaster Pro 8.0.14 is now available to you under Help, Check for Update. Changes are as follows:
- When using Direct Entry in the Schedule Editor on Runtime or any length type field, you can now prefix the desired time with ~ to perform a Close To search and find songs at or near the specified Runtime. For example, entering 4:00 will find songs where the runtime Equals 4:00, but entering ~4:00 will find songs where the runtime is Close To 4:00.
- When viewing a Numeric type field in the History Browser, the header row will now provide a tooltip showing the minimum, maximum and average values that appear in that field during the history time period you are viewing. This applies to numeric type fields added in the User Field properties on the Display tab in the History Browser configuration.
- History loaded by the History Graph can now be refreshed after a short time to reflect changes made by other users, even if you are not making schedule history changes yourself.
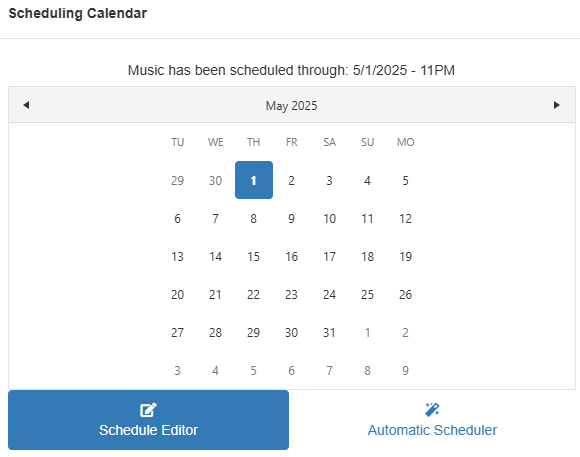
- Made an adjustment in the Scheduling Calendar to prevent it from stealing the focus after you launch an operation from it, in the case where you have it set to remain open.
- Corrected an issue where the History Purge function could cause locked elements to become unlocked.
- Updated the calculation of the vocal music counters on the Canadian CRTC Self-Assessment Report.
You can find the full list of changes under Help, Release notes. Contact your MusicMaster Scheduling Consultant with any questions.
Enterprise Functions Publicado por Laurie Knapp en julio 17th, 2024
Adding Songs to Stations
Unlike in the Desktop client, Stations are not yet able to import songs from the Enterprise library. However, songs can be assigned to Stations from the Enterprise level in the usual manner.
Enterprise Menu
The Web Client has a Manage Stations option directly under the Enterprise menu, where in the Desktop, this is a submenu under Enterprise > Stations.
Add Station is available in the Manage Stations dialog, where in the Desktop it’s also available as a submenu item.
Station Options
The Web Client has a sub-option for LibraryEditorOptions, while the Desktop has Library Options as a toolbar option in Library Maintenance.
The Clocks, History and Misc. will display a red angled line through areas where no color has been selected. This is depicted as a gray box in the Desktop Client.
Not Yet Available in the Web Client
Enterprise functions that still require the use of the Desktop Client include Automated Tasks; Create Database Backup; and Users and Roles.
Optimum Rule Performance Goal Publicado por Laurie Knapp en julio 15th, 2024
by Paul Ziino
MusicMaster offers lots of options when it comes to Optimum Goal Scheduling. There are goals for song and keyword separation, goals for numeric fields to get the highest or lowest scores, goals for hour and shift exposure on keywords and songs, and more. Today we focus on the goal of Optimum Rule Performance.
In your rule tree you’ll find this goal under the Available Rule Types/Optimum Goal Scheduling/Song Goals.

Click and drag that goal into the Optimum Goal Scheduling folder under any of your categories in the MusicMaster Rule Tree.
Here’s how it works. Every song in the active library has a score indicated in its Performance field. This score is calculated by the average number of times MusicMaster has attempted to schedule that song before it is plotted in a log. The higher the Performance score, the more difficult it is for that song to auto-schedule. Open a category, add the Performance field to your grid, and sort by it. You’ll see the songs that are easiest to auto-schedule (lowest Performance score) and most difficult to auto-schedule (highest score).


In the images above you can see that “Sweet Home Alabama” and “Dude Looks Like a Lady” are much easier to schedule than “Already Gone, “Live and Let Die,” and “Listen to What the Man Said.”
Based on the songs we see in those images, if MusicMaster is given the choice between “Play the Funky Music” and “Crumblin’ Down,” and all other things are considered equal between the two songs, Optimum Rule Performance goal would dictate that “Crumblin’ Down” will be favored because it is more difficult to schedule. The goal gives preference to songs with higher Performance scores because those songs are more difficult to schedule (e.g. takes more attempts on average to schedule). With those two songs, it is likely more difficult to schedule the Mellencamp tune because there are more songs by that artist in our library than there are by Wild Cherry.
When you look at Performance scores, it’s all relative to the other songs in the category. If you have some songs with scores of 10 or 20 and others with scores of 2000 or 2500, what makes those with the higher score so much more difficult to auto-schedule? Is it an overabundance of that artist in the library and the separation for that artist is too great? Is it because you are limiting slow songs too much in a library that is heavily coded as slow? Is it due to incorrect coding, keywording, or dayparting? With all other factors considered and adjusted as you see fit, Optimum Rule Performance can help get those harder-to-schedule songs to plot a little more frequently.
Have questions on this or any other MusicMaster Scheduling Goals? Make sure to reach out to your MusicMaster Scheduling Consultant for help.
Schedule Editor Publicado por Laurie Knapp en julio 8th, 2024
Test Results
The Test Results panel appears as part of the Infobar in the Web Client. It will automatically appear when you search for a replacement song as long as you have the Infobar active. You can also change the Infobar to other tabs while it is open, hiding it, but it is always available as the Schedule tab of the Infobar. The Schedule Editor has a Test Results icon on the toolbar that will also make this visible.
Schedule Editor Toolbar
Some toolbar options are not shown in the Web Client. Note, the order of icons may also differ from the Desktop.
Schedule Calendar
When you open this you will see options at the bottom for both the Schedule Editor and Automatic Scheduler. The Schedule Editor only allows you to pick the date, while the Desktop Client has other options to load the number of hours and how the cursor is handled.
Schedule Editor Options
Shift-Insert is not a setting that is used in the Web Client. Likewise, hot keys are not used, so the option to Emulate Hot-Keys is not here.
Other Functions Not Yet Available on Web
Direct Data Entry, Song Card Editor, Song Marking, Vicinity Viewer, Display Burn Spreadsheet, Check the Log, Export to Web, Key Mapping, Recap Report, and Traffic System Interface.