
MusicMaster Blog
Blog Archive
June- Importing/Exporting clocks within MusicMaster CS/Web Client
- Done with Dupes: ‘Multiple Categories’ in CS
MusicMaster WideOrbit Voice Tracking posted on May 31st, 2021
MusicMaster WideOrbit Voice Tracking
By Jesus Rodriguez
Recently because of our industry’s current state and lockdowns, more stations have to resort to voice tracking. This blog will show you the standard and preferred method of setting up your MusicMaster database to voice track with WideOrbit, formerly known as SS32 or Scott Studios.
It is first essential to understand the different voice tracking “Join Types.”
Join Types:
JU = Join or link UP in the playlist or link the voice track to the playlist’s previous cut. This prefix would be used when coming out of a song going into a non-song event such as a liner or a stop set.
JB = Join to BOTH the pre and post cuts and would be used when the voice track is between two songs
JD = Join DOWN to the post-cut only and would be used when the voice track follows a non-song event such as a commercial or imaging element
JN = Join NONE or NEITHER the pre nor post cut and would be used when a voice track is designated as a generic announcement such as a weather cut, and the voice talent knows to mention neither the pre nor post cuts.
Now let me explain why this is important. When recording the voice track, the voice talent announces the Title and Artist of either the cut before the voice track, the cut following the voice track, or both, and the JN prefix are used. One of the songs gets deleted or moved after the voice track is recorded, the voice track would play, and the listeners would hear the DJ announce the wrong Title and Artist of the cut that played on air. If the proper linking or “joining” prefixes are used, and the voice track loses its link to the event it was linked to when the voice track was recorded; the voice track will not play
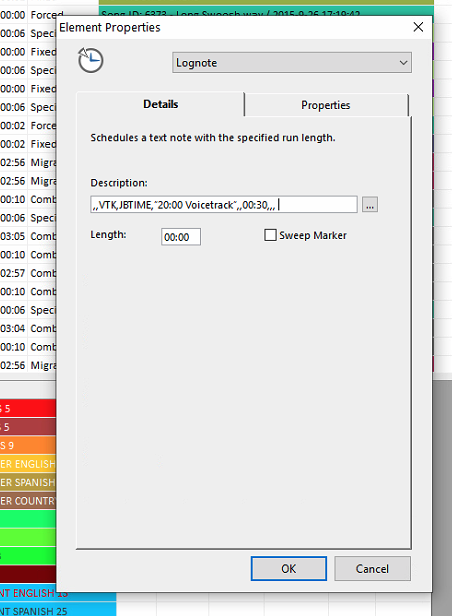
How do we implement this into our MusicMaster data? There are two options: using a log note or creating a category or categories for each of the Join Types. I would advise you to consult with your WideObit representative on which method would be best for you. The log note type has been a heritage way of doing it, but it has some limitations if you plan to voice track for more than a month. You can copy and paste the log notes below that best suit the join type you need into your clock using the log note element type. Then adjust your air minute and seconds as shown below as 20:00 and your length of the voice track as shown below as 00:30.
Log note Method:
,,VTK,JUTIME,”20:00 Voicetrack”,,00:30,,,
,,VTK,JBTIME,”20:00 Voicetrack”,,00:30,,,
,,VTK,JNTIME,”20:00 Voicetrack”,,00:30,,,
,,VTK,JDTIME,”20:00 Voicetrack”,,00:30,,,
 Category Method:
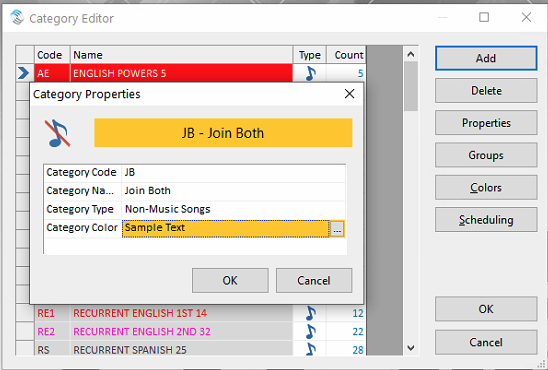
We have been advised that this is the preferred method to use, but there is no wrong answer here as every database’s needs are different. Once you have selected which Join Types you would like to use, create a category for each. You can create a new category by going to the menu bar Dataset, Library, Categories. Next, click on the Add button on the right in that window. Give it your Category Code, Category Name, Category Type, and Category Color. I would advise you to use the two-letter Join Type as your Category Code and the Join Type name as your Category Name for consistency.
 After creating the categories, we will now make at least 1,000 song cards for 1,000 voice tracks that can be used. You can use a higher count if you do a lot of voice tracking. The goal here is to take weeks, if not months, before anyone’s voice track circles back around in rotation, preventing an accidental overwrite of a voice track pending to go live on air in the upcoming days. On the menu bar, go to Dataset, Library, Add New Songs, then type in 1000 or the amount you prefer and click ok.
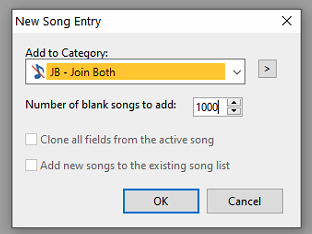 You will now see 1,000 empty song cards. Next, we will use the mass changer to assign the WideOrbit Category you are using for your voice tracks, the WideOrbit Type/Prefix, WideOrbit Asset/Cart number, and your Artist/Title description.
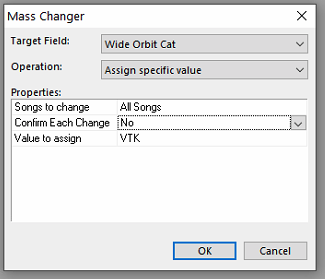
First righ- click within your WideOrbit Category Field of any song card, then select Mass Changer. Make sure your Target Field drop-down is set for the WideOrbit Category Field. The Operation drop-down should be set to Assign Specific Value. Songs to Change set to All Songs, Confirm Each Change I usually go with No, and Value to Assign type you will enter your WideOrbit Category Code for your voice tracks. Click ok, and you should now see your WideOrbit Category code in your field for all the items.
 Next, let’s do the same process but for your WideOrbit Type/Prefix in the Target Field to add the JB join type or whichever you selected for the Value to Assign. Click ok, and you should get the same results of your join type populating in every item in that field.
 It is time for the WideOrbit Asset/Cart numbers. You may have already been designated a series of cart numbers to use for your voice tracks, but if not, I like to use a high series of numbers like 8,000-8,999 if available. We will do the same process with the mass changer, but make sure your Target Field is your WideOrbit Asset/Cart number field, and your Operation is Assign Sequential Values. Set your starting value to the first number in your sequence. In my case, it will be 8000. You will click ok, and that field will populate with 8000 to the last number needed in sequence to fill them all.
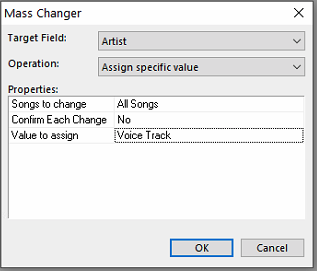
 We will now add your Artist and Title description to those fields. This process is the same as the first one we did but ensure your Target Field is set to Artist with Operation set to assign specific value. I like to keep it simple and use Voice Track as my value. You will click ok and see that description populate in that field in all your items. Repeat for your Title field. I tend to use Voice Track again to describe that field for consistency, but you are welcome to use anything you like, possibly your station name.
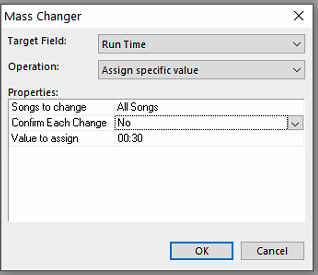
 Last in the mass changer process will be your runtime. The process is the same as the previous ones to get to the mass changer then set your target field to Run Time and Operation to Assign Specific Value. You can have your run time value be what you like, as shown in my example below as 00:30. Click ok, and that length will populate in your field on all the items.
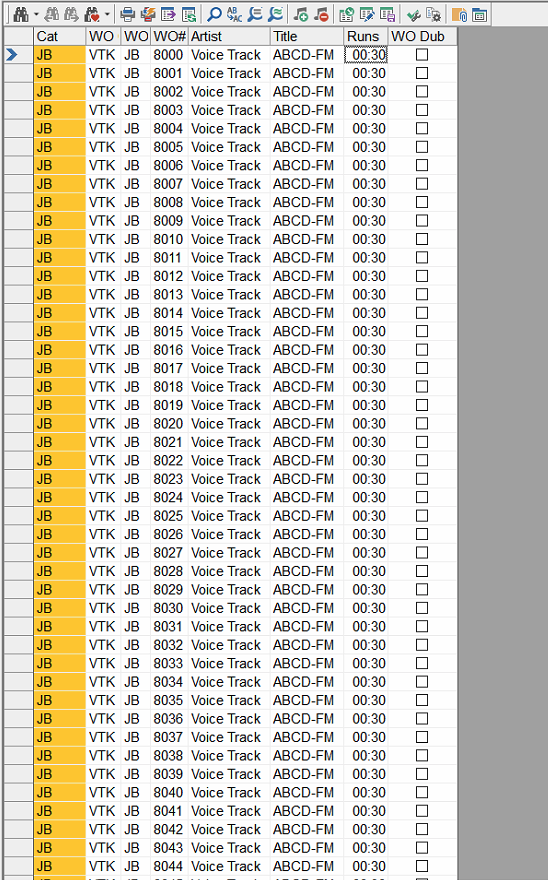
 You can repeat these steps if you plan to use more than one Join Type. Your WideOrbit MusicMaster voice track category is now ready and should look something like this below.
 You can now add this category to your clocks as fixed positions so that it rotates through them.
 There are a couple more things I would suggest you do to guarantee an even rotation of your voice tracks and have no issues with rules interfering with your category. First, go to Dataset, Schedule, and Schedule Properties. Locate your category on the list and set the column for Depth to 1.
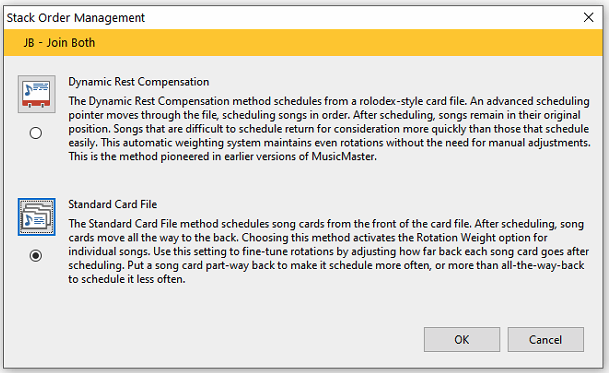
![]() Second, go to Dataset, Schedule, Schedule Order, select your category from the drop-down, and click on the Category Order Management tab, which is the third tab in this window.
Second, go to Dataset, Schedule, Schedule Order, select your category from the drop-down, and click on the Category Order Management tab, which is the third tab in this window.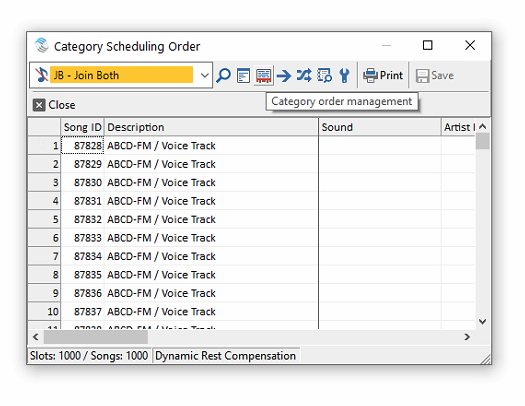 Set the Stack Order Management to Standard Card File.
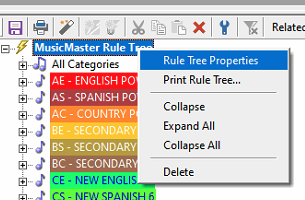
 Finally, let’s make sure you do not have any rules affecting your voice track categories to plot naturally in sequential order. Go to Dataset and then to Rules on the Menu Bar. Once in the Rule Tree right click on the bold MusicMaster Rule Tree at the top, go to Rule Tree Properties.
 Place a checkmark in the box for the voice track categories.
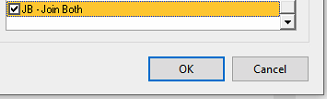 This selection means these categories will bypass the All-Category section of the Rule Tree so the tracks will plot naturally. Ideally, you would not have any rules in the category itself either, but if you need some for any reason, place your rules directly in the category itself.
You are now set and ready to voice track using MusicMaster with WideOrbit!
If you have any questions, please contact your Music Scheduling Consultant.