
MusicMaster Blog
Blog Archive
June- Importing/Exporting clocks within MusicMaster CS/Web Client
- Done with Dupes: ‘Multiple Categories’ in CS
- Cross-station rules and protection in MusicMaster CS and MusicMaster Web Client
- Setting Up Users and Roles in MusicMaster CS — Easy, Breezy, and Totally Doable!
- MusicMaster Pro 8.0.15
Configuring the Format Clock Display posted on August 22nd, 2022
Configuring the Format Clock Display
By Laurie Knapp
Just like in other areas of the program, you can configure how the clock editor screen looks in MusicMaster. This article will show you some available customizations and explain what each display column means.
First, the Show/Hide Pie View icon gives you the retro pie chart view, along with panels with information on category and element usage. Also in this panel is the Migrating Positions and FlexRules Analysis wizard, new in Version 8. (Read more about that feature here: https://musicmaster.com/?p=8220)
As you can see, you can split the screen to display both views.

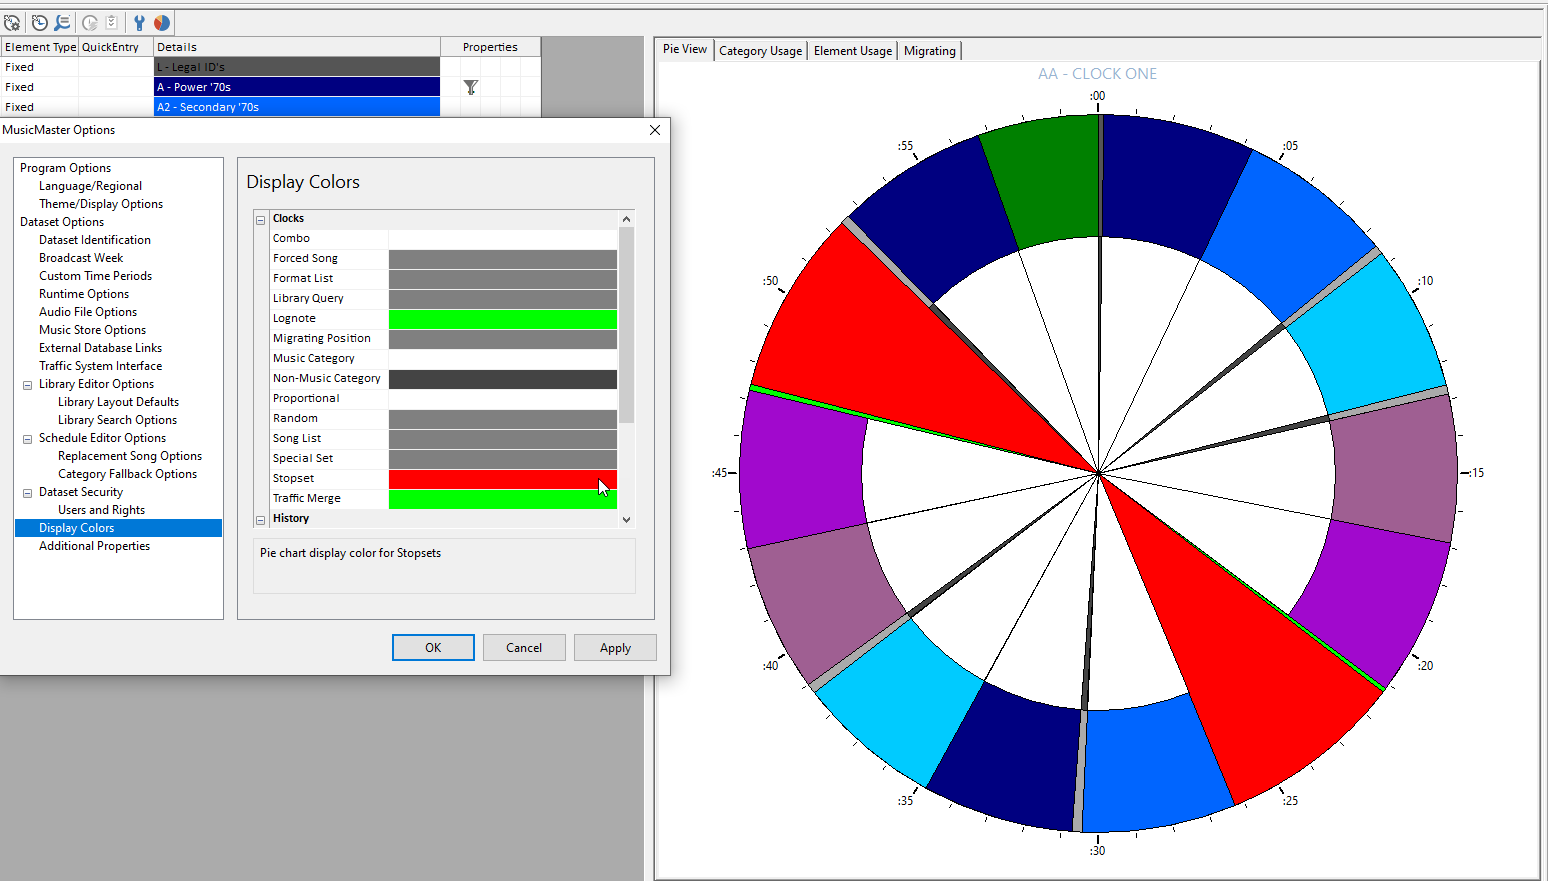
To change the colors of the pie chart to be more meaningful to you, go to Tools > Options > Display Colors. As an example, I will change my Stopsets to be a bright red color.
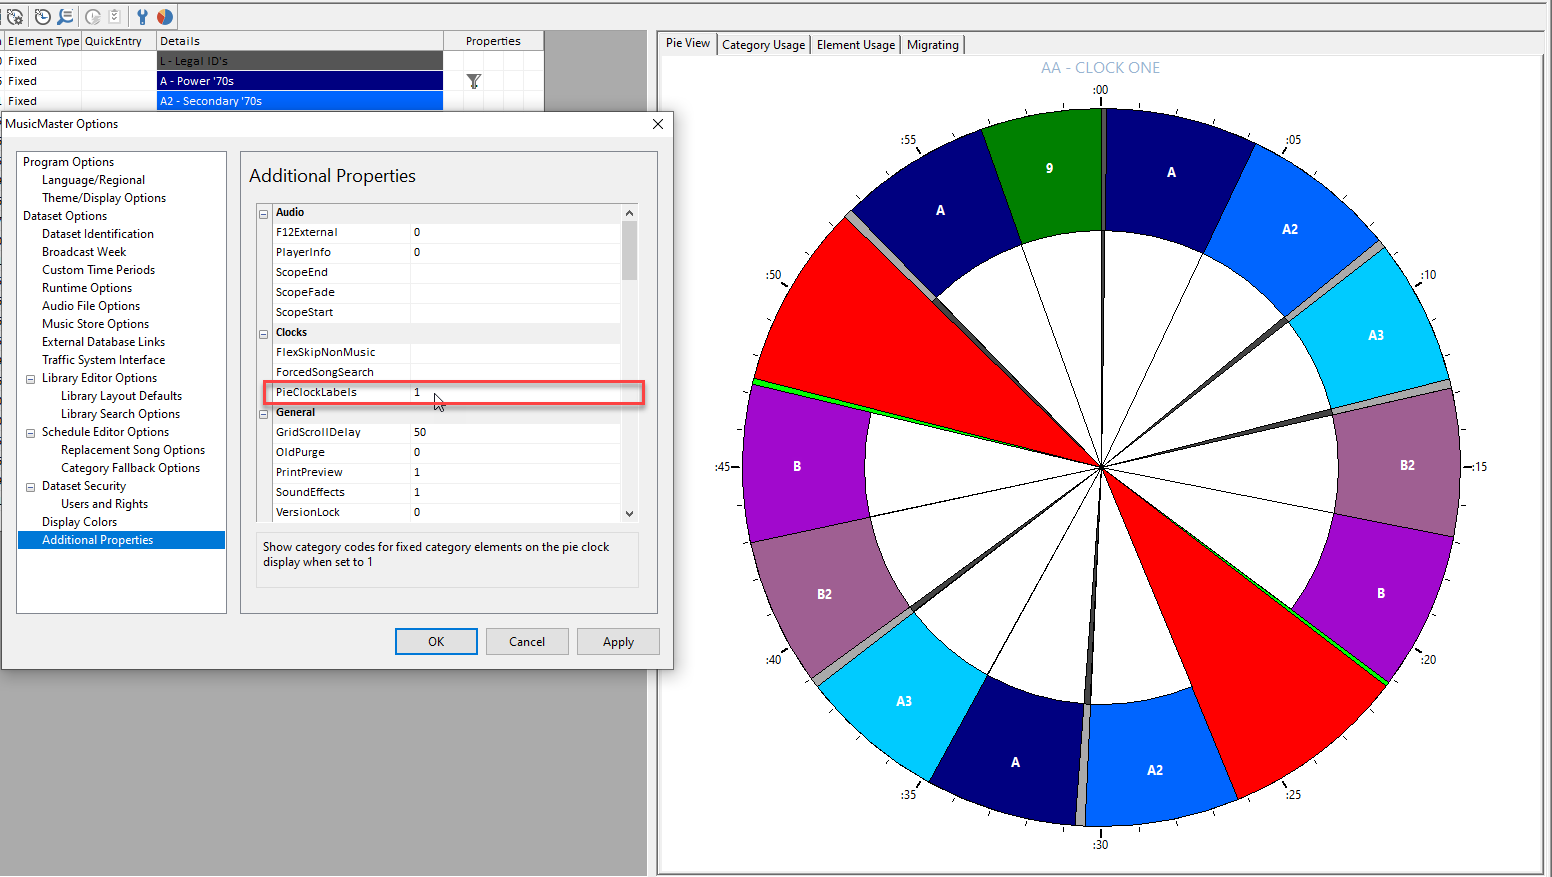
If you’d like to add category and element information to the pie slices, go to the Clock section of Additional Properties and add the number 1 in the Pie-Clocks-Labels field.
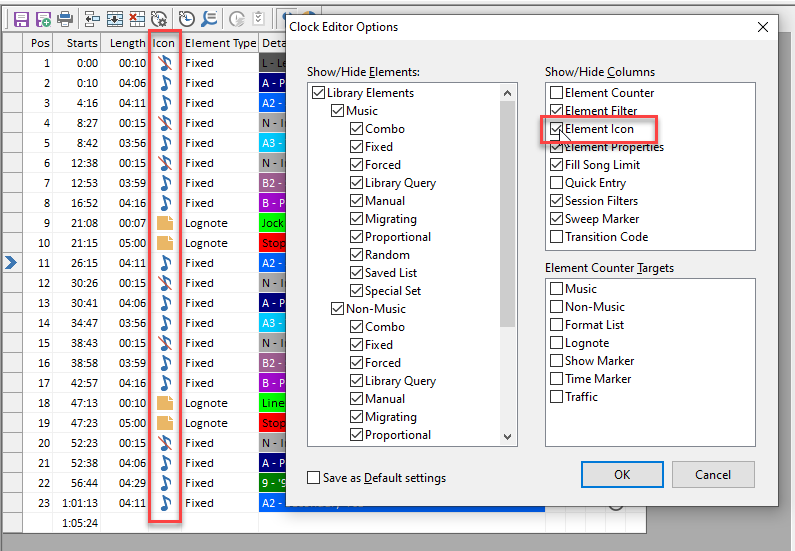
Back in the Clock Editor, you can click the wrench icon to set Clock Editor Options.
You can filter what types of elements are displayed in your clock while you are editing. For example, you may choose to hide Lognotes when editing your music elements.
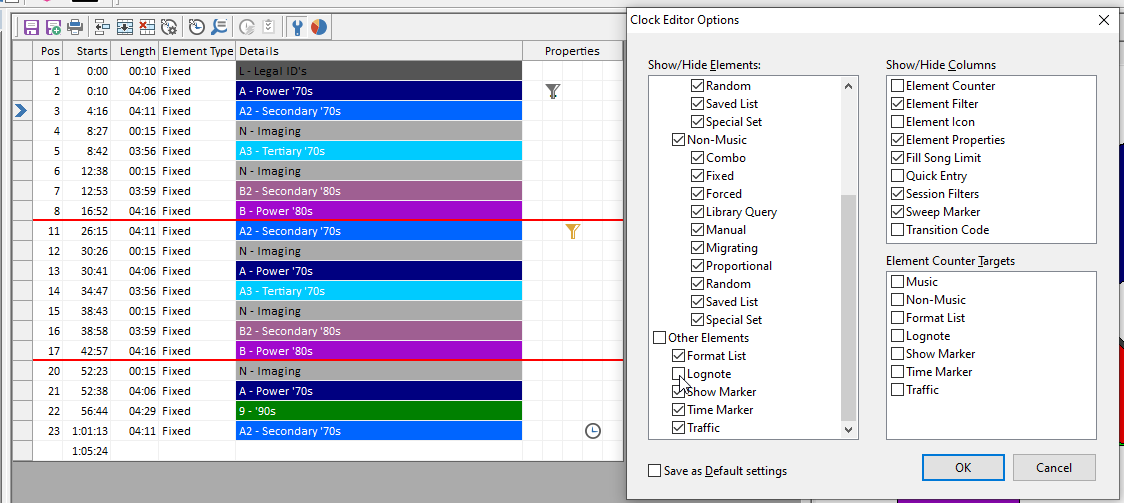
You can also determine which columns you see in your clock editor.
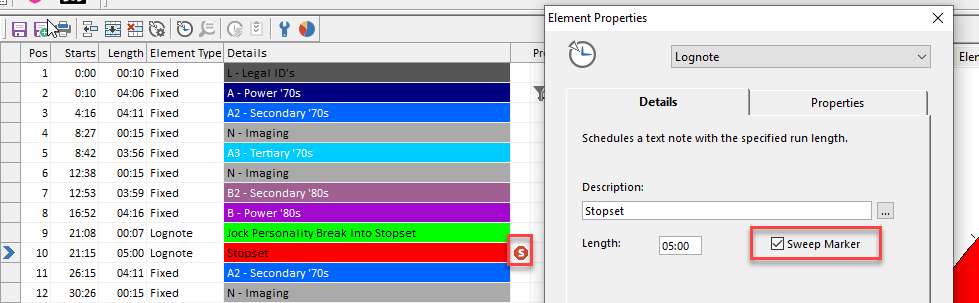
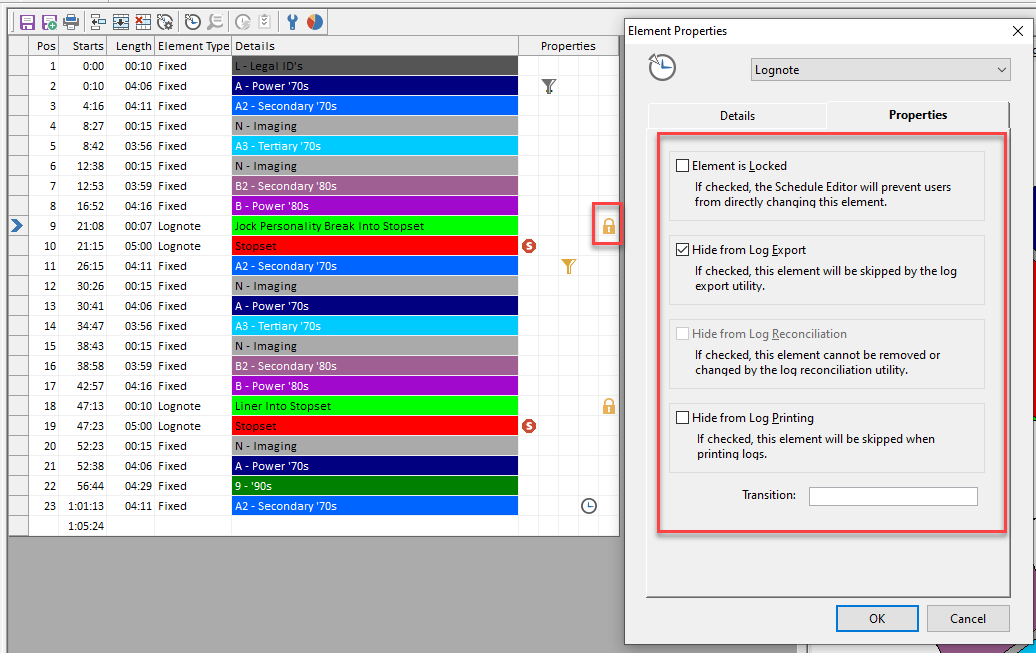
Some of these columns, shown under the Properties header, contain icon markers that represent element properties. You can double click the icons to edit the related properties. You can also hover over the icons to get a balloon tip.

For example, when you add a stopset that is a sweep marker, you’ll see a red stop sign with an S inside.
If you chose to lock the element, or hide it from export, reconciliation or printing, you’ll see a lock icon.
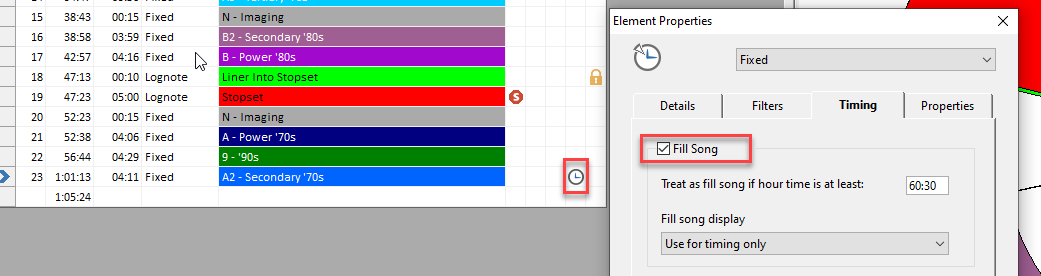
If you set a fill song for timing, you’ll see a clock icon.
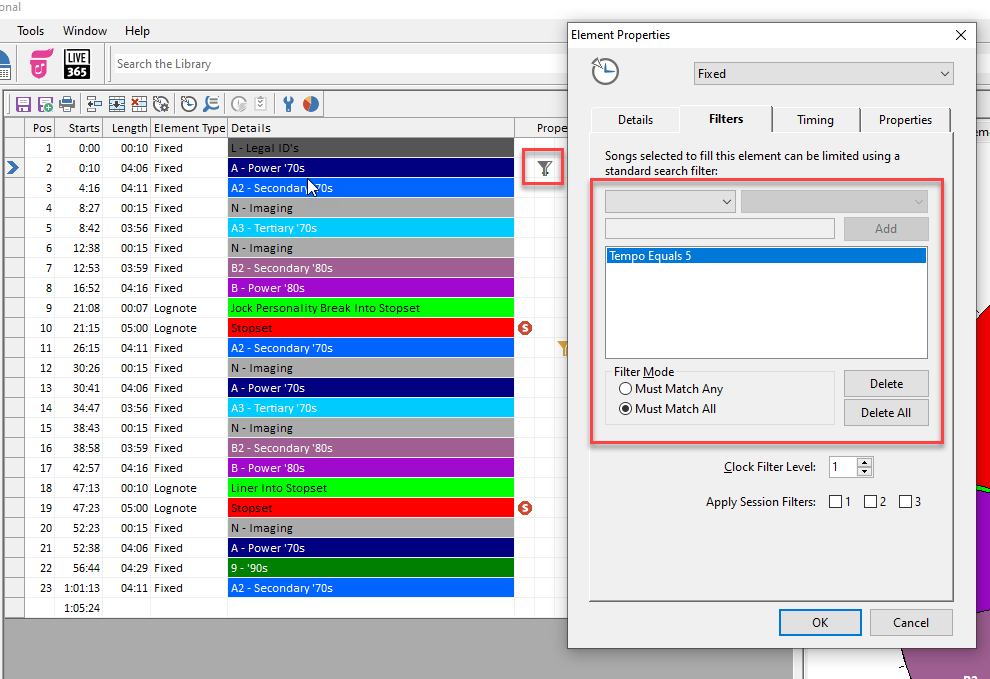
You’ll see a filter icon when an element has an element filter or a session filter. An element filter calls for a song that meets criteria you set in the element properties. (Watch a walk through on setting up Clock Filters here: https://www.youtube.com/watch?v=D76hqFv8nzc)
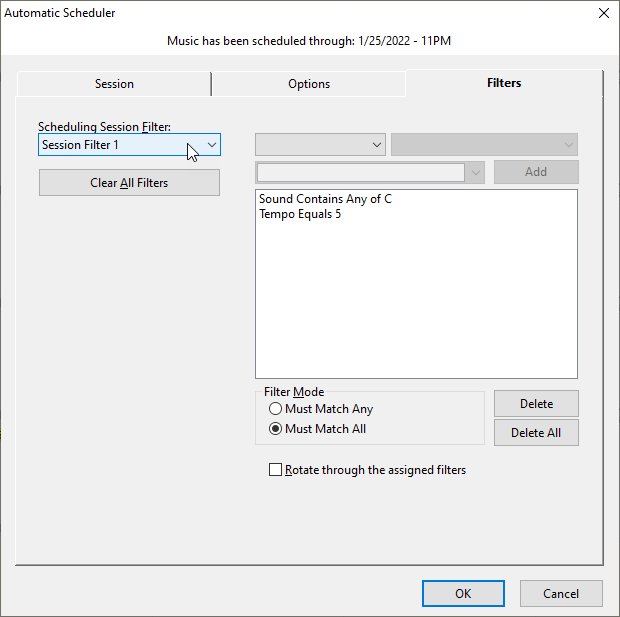
A session filter calls for a song that meets criteria you set later in the AutoScheduler, so you can use different criteria each time you schedule. (Read more about Session Filters here: https://musicmaster.com/?p=6702)

Other columns include the Element Type, or an Element Icon which represents the type.
The Quick Entry column gives you a place to quickly add and configure new clock elements using simple letter codes. You can look up the codes in Help, or by hovering over the element type in the InfoBar. (Learn more about Quick Entry here: https://musicmaster.com/?p=7440)

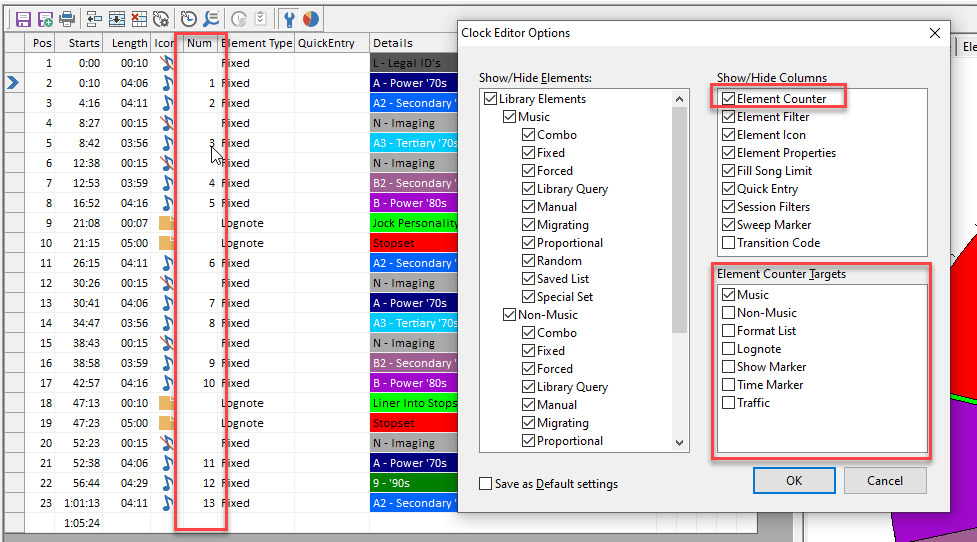
You can also check on the Element Counter, which allows you to see a secondary count of all elements that match the type you select in the box below. For example, you could use this to see at a glance how many music elements you have in your clock.
If you don’t see all of these options, make sure you’re on the latest version of MusicMaster. You can go to Help, Check for Update.
Should you have any questions or need assistance, reach out to your Music Scheduling Consultant.