By Brian Wheeler
Your MusicMaster database is your baby. It’s what makes your station like no other on the planet. You’ve pored over the rules, you’ve edited and exported countless logs, added and moved countless songs. It is the essence of the station. It’s your product. What would you do without your database?
Let’s not find out! You’ve heard MusicMaster scheduling consultants hound you for years to perform regular backups, so you know the drill. You may already dutifully perform backups. I know several users who back up their data daily. But there is a NEW threat that you should be aware of, if you’re not already.
At least three major broadcast groups in North America have been hit by ransomware in the last year. Ransomware shuts down your systems and holds them hostage, hoping for a big payday. Cybercrime is on the rise, and everyone is a potential target. Hopefully your IT/Engineering department has taken steps to lessen the threat. But YOU can do something for yourself, too!
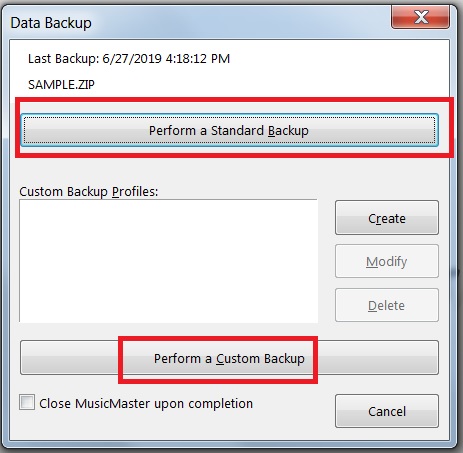
Under Tools, Backup, you can not only create a standard backup, but you can create a CUSTOM backup.

This enables you to put a backup of your data in another location besides the standard backup to your data folder, a place that could be vulnerable to ransomware or crashes. One extra backup to your thumb drive and you’ve got an extra layer of protection should the worst occur.
In this example, I am sending the backup to the Desktop.

Here, I’m setting it up to go to an external drive. Cloud options could also be considered for this.
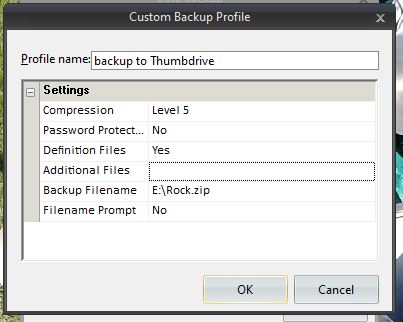
Note the Additional Files option. If you use any utilities like Library Synchronization, Reconciliation, Traffic Merge or Nexus, you can specify those extra files as well. That means you’re external backup would contain your data and every file you need to continue working.
During a recent incident in which ransomware crippled a station, a MusicMaster user called me up, we installed a copy of MusicMaster on a personal laptop he owned, and he calmly put his flash drive data into his laptop. He was scheduling logs in a matter of minutes.
I hope you never encounter a situation where a thumb drive is your lifeline to keeping your station afloat. But if you do, you’ll be so glad you took this extra step in protecting your baby.
If you have any questions on how to set up a custom backup, feel free to reach out to your MusicMaster Scheduling Consultant.
If you’re doing this already and think you’re done, think again. Come back next week to find out the one thing you’re probably not doing to ensure you are covered in an emergency.