
MusicMaster Blog
Customize MusicMaster with Your Station’s Logo and Sweeper publicado em September 24th, 2018
By Jerry Butler
In a time when many program directors are programming multiple stations, it can be really frustrating to find you have made changes in one database, when intending to make those changes in a different database. MusicMaster gives you the ability to customize multiple settings throughout the software for a different feel and look for each database. Many programmers have cloned databases to create a new station. This works great, but copies everything including your categories and category colors over to the new database, making it difficult to tell them apart. A very easy way to customize each database is by using a station logo or sweeper when you open the database. Here is how you can set up these features.
Click on Tools, Options and Dataset Identification. In the first field, you can change the name that you see on the top left of the screen when you have the database open. This can differ from what the actual database file is called when opening up MusicMaster.

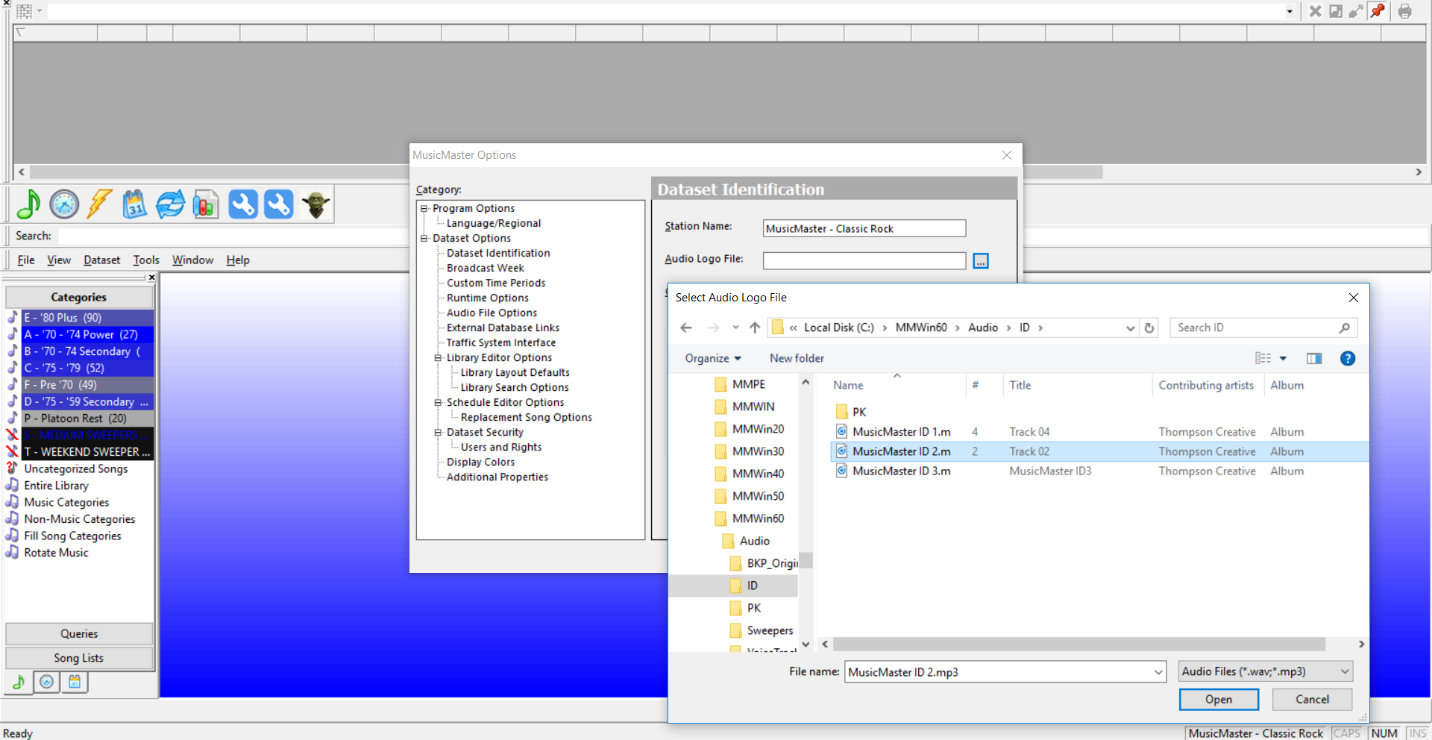
The next field allows you to set up an Audio Logo (Sweeper, Liner, Favorite Movie Drop). Click on the button to the right of the audio logo field to search your computer for an audio file you would like to play when opening the database.
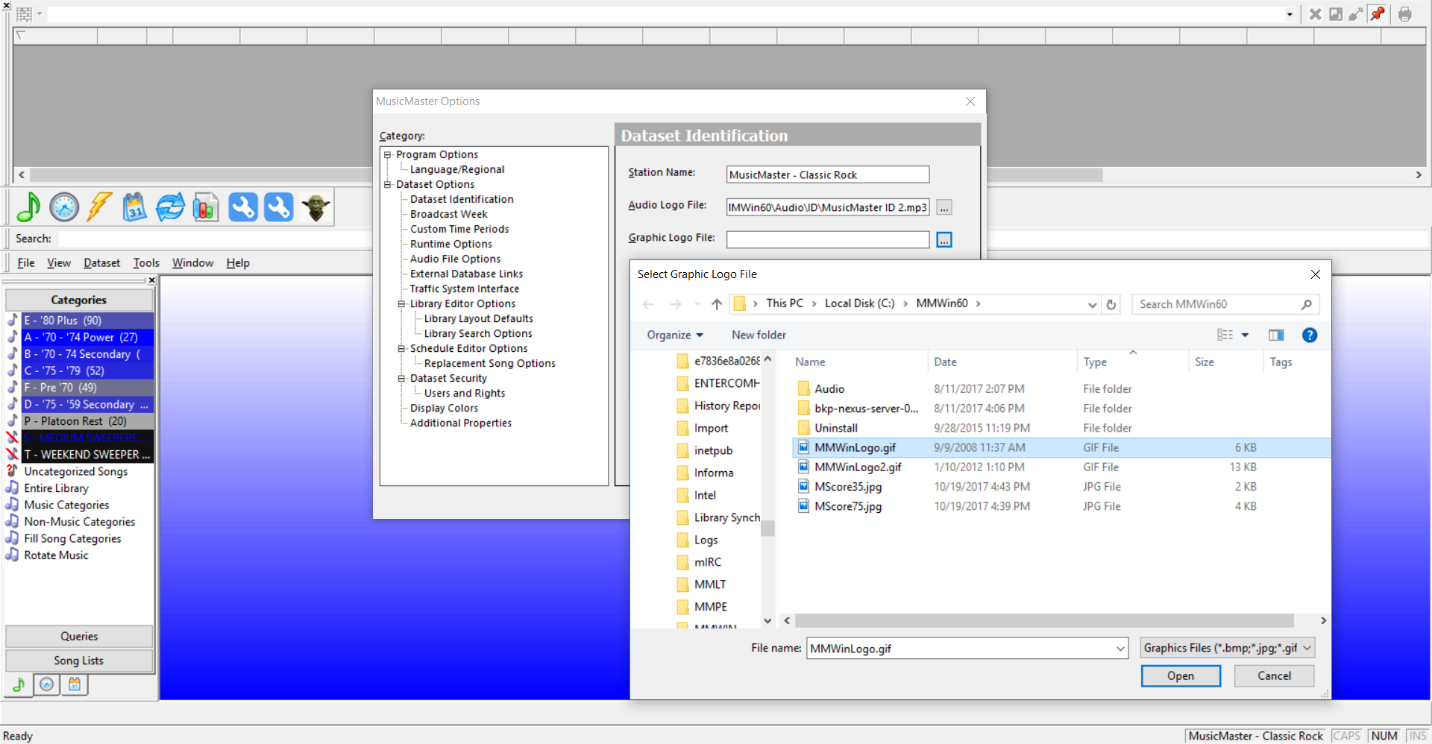
The next field allows you to show a Graphic Logo file. Click on the button to the right of the field to find a file on your computer that you would like to show in the main window of MusicMaster upon launch.
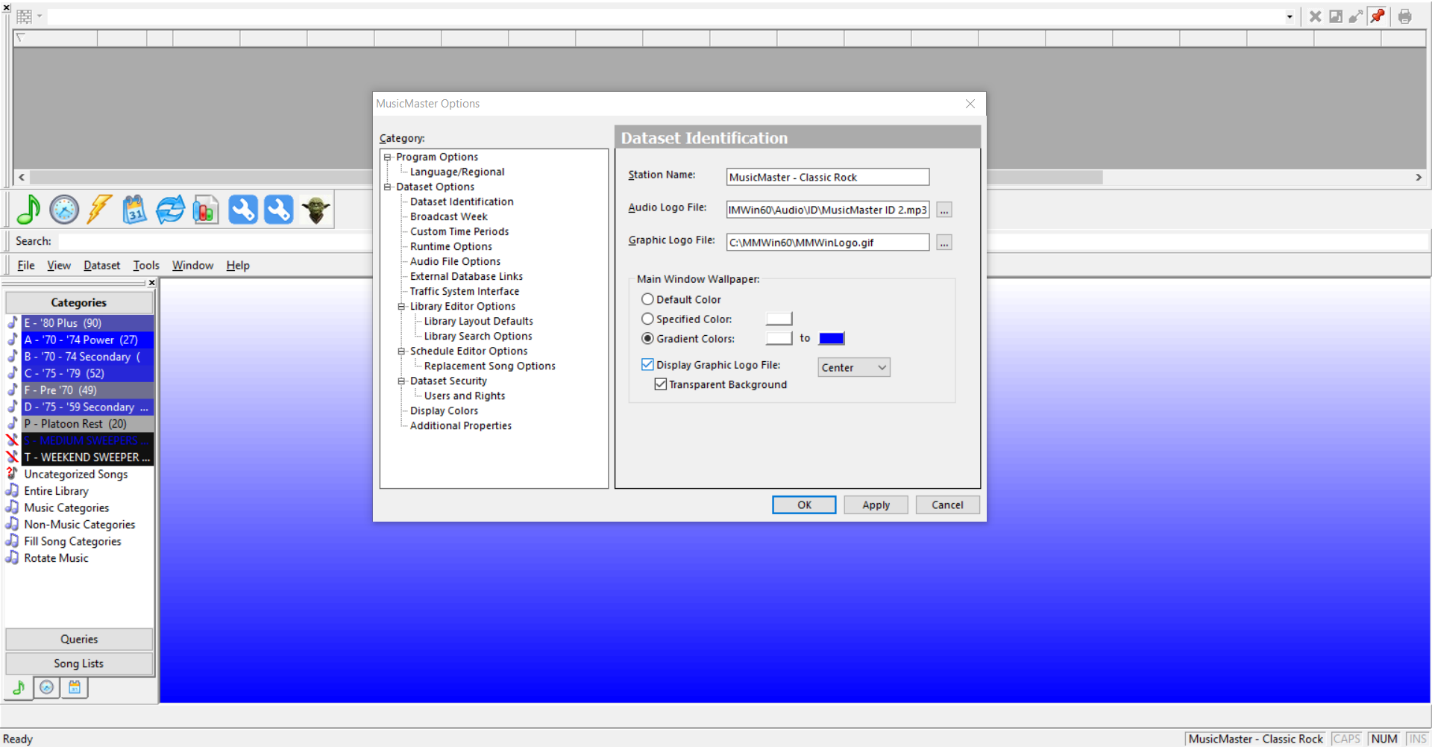
Once the file is selected, you need to click display the graphic logo file check box. You can also adjust the position of the logo with the dropdown selection and choose to have the background as transparent. There are also settings for a background color with or without using a logo.
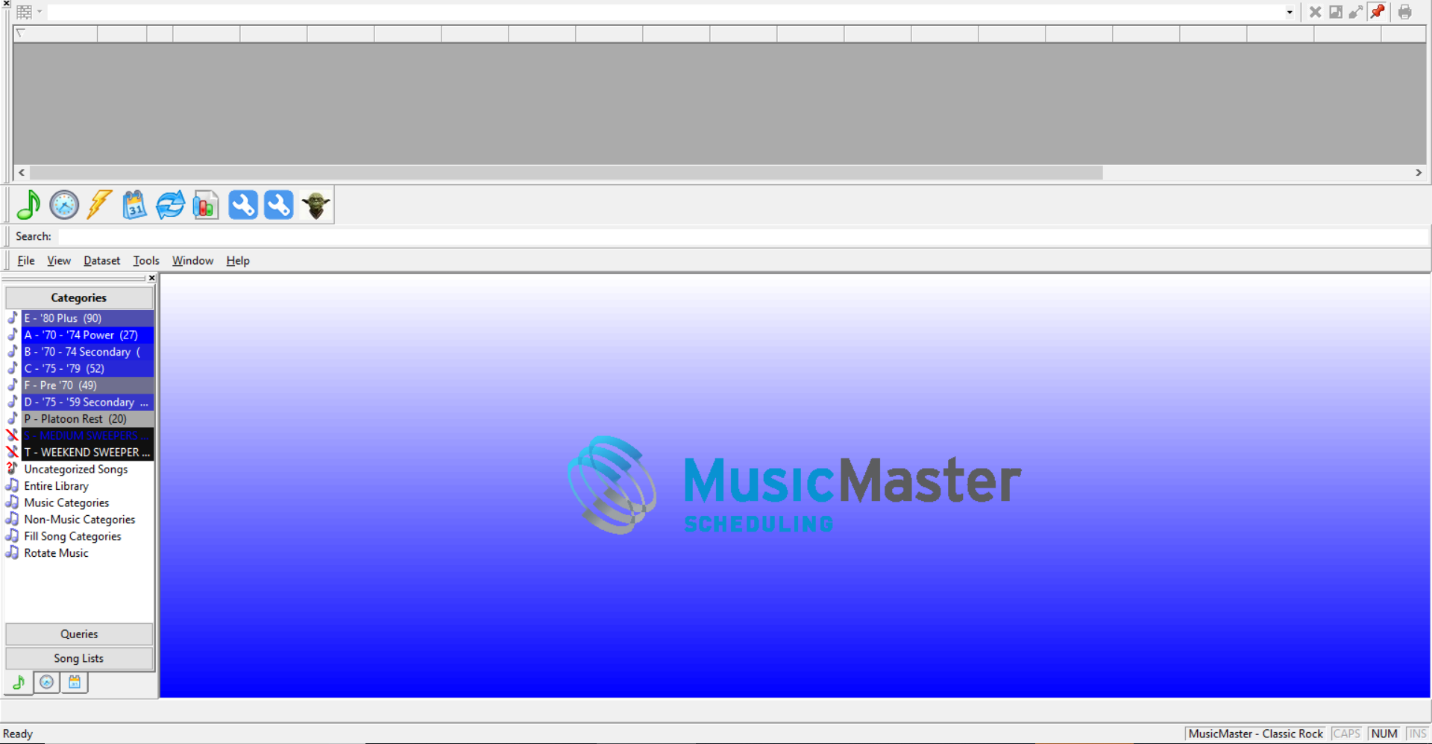
When you open the database you will now see your logo and hear the audio you selected.
Play with the setting and get the database customized the way you want it. Happy Scheduling from MusicMaster!
New Station Library In 30 Seconds! publicado em September 10th, 2018
By Jesus Rodriguez
Lately, I have received calls from clients ready to launch a new station. Some may be simple tweaks from a current database in-house or inherited from a sister market. Then there are others that are starting a station from scratch using a blank database. What if I told you that there are two ways to get your data ready within 30 seconds?
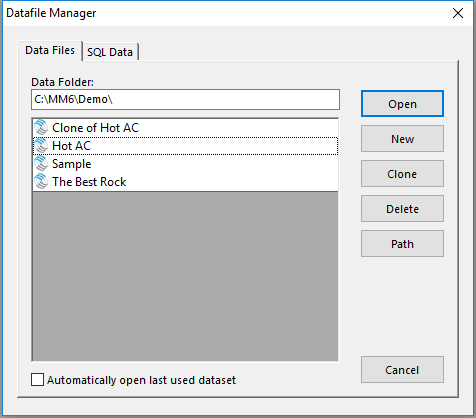
My first option for you would be to clone your database by going to File and Open Dataset. There you will see your clone button so that you can make an exact copy of your database. It is much easier to delete the items that you don’t need like unnecessary clocks or rules than trying to build an empire from scratch.
Once you have done that there is another way to get your database up to date. It happens to be my second option of how to get a database started within 30 seconds if you are going to start a database from scratch.
I would suggest using our library sync option. This feature allows you to bring in the song metadata into your library from your automation system so you are only doing the data entry once. I would always suggest importing your audio into your automation system first, and hopefully, your files are correctly tagged with the metadata to minimize any adjustments. Once it is in your automation system, I would recommend you locate a file that most systems create that consist of your full inventory list of the items you have in it. You can then use our library sync feature to import that information from your automation system. The best part is that it can bring in all audio music and imaging as well as anything else you may have like voice tracks or promos.
We have the necessary file set up for most major automation systems. We also have blogs on how to create the necessary file to make this import happen. Either way, feel free to contact your MusicMaster support representative for any assistance you may need.
Schedule Editor Layouts publicado em August 27th, 2018
By Paul Ziino
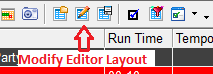
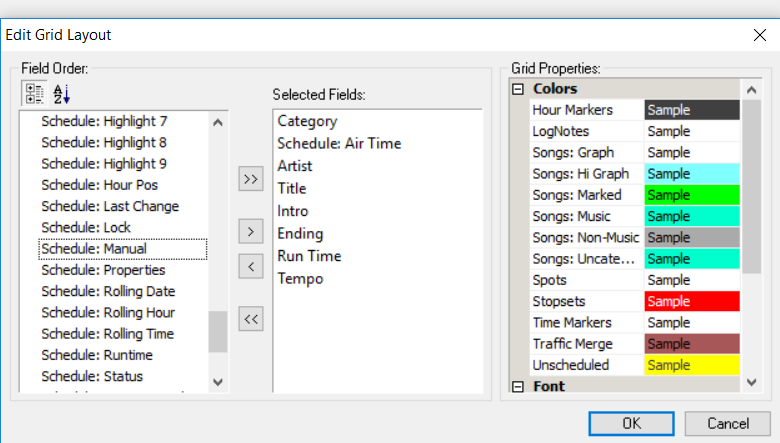
You can really make your Schedule Editor look just about any way you want. You can add and subtract fields via the Modify Editor Layout icon.
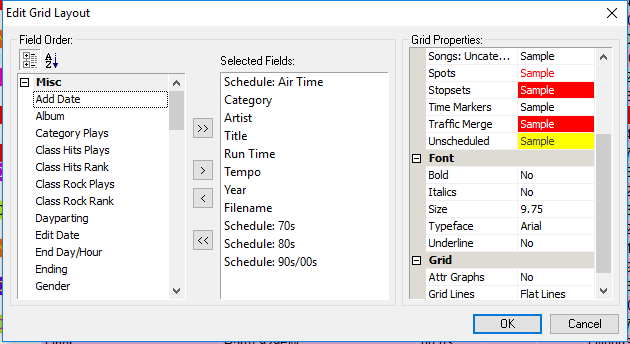
 Here you can also change the font, size, colors, and grid attributes.
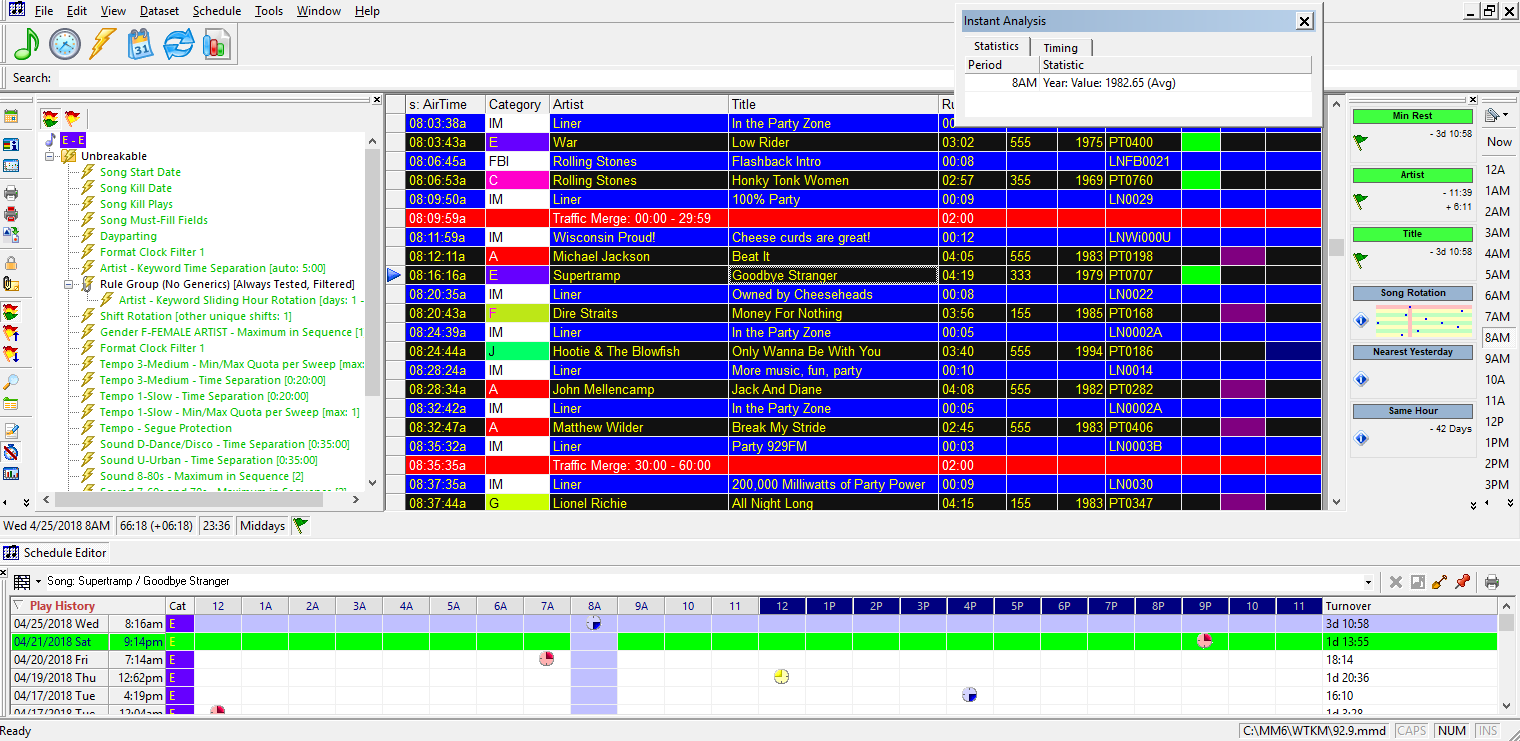
 Click the Toggle Toolbars icon and you can turn on the Test Results panel, Instant Analysis, and more.
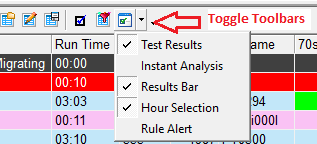 Once you’ve turned on the Results Bar, right-click on any panel and select Customize to see all the different items available for review.

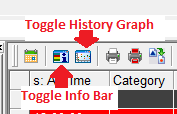
And with other icons you can toggle the history graph on and off, as well as the Info bar.
 With Show/Hide Elements you can hide different elements from view.
 You can turn off lognotes, only display the unscheduled items, hide specific categories, display hour and day counters, and more!
 Get it all set up just the way you want it, and you have a completely customized workspace!
 And with a few clicks and drags you can rearrange the whole thing and some color adjustments, you have a whole new look!!
Customization of your Schedule Editor is just one of the ways you can make your MusicMaster yours! Have any questions? Contact your Music Scheduling Consultant for help.
Troubleshooting Special Sets publicado em August 13th, 2018
By Marianne Burkett
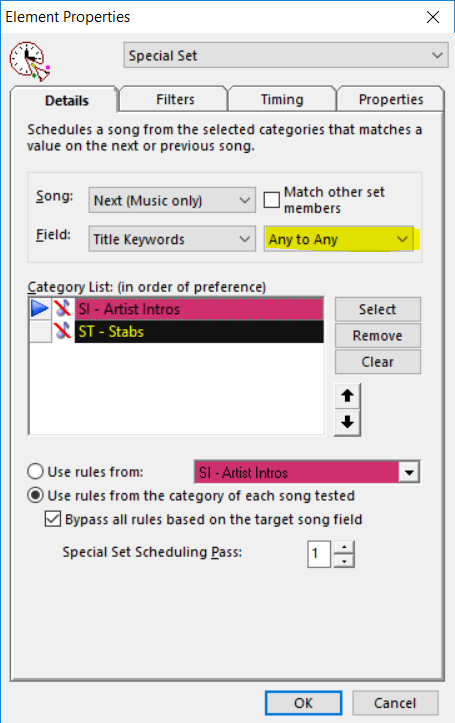
Special Sets in MusicMaster are a great way to do things like twofers, matching up artist liners to songs, etc. As we build our clocks with special sets, sometimes we do things in a hurry and forget the important details section. In the example below, you’ll see the special set is matching up Title Keywords with the setting of All(Exact). It is looking at Next Song (Music Only). In the bottom area we’re using rules from the category “Artist Intros” and Bypassing any rules that might keep Title Keywords apart.
 A Special Set in this configuration would need an Exact Match in the Title Keyword Field in both the Non-Music Artist liner category and the Music Category that comes after the Special Set in the clock. It will only work with an Exact Match from Field to Field. The liner is looking at the next song scheduled.
The following configuration would work if you didn’t have an artist liner produced yet for a specific song and wanted some kind of Generic liner to schedule automatically. You would put a Generic keyword in the song and liners and add the generic category to the Special Set. Your match configuration could be “1st to Any” or “Any to Any”.
I receive calls on a regular basis when “some” Special Sets are working and “some” are not. It’s all a matter of going directly to the specific clock where the Special Set isn’t working and examining the configuration.
If you are careful setting them up, you shouldn’t have issues. A book could be written on this subject alone, but today’s blog is just a reminder for you to be careful when adding your Special Sets. Pay attention to which direction you are looking in (next or previous, song or music only), what Field are you matching and the type of match (Exact, First, Any or All). When done correctly, Special Sets save you massive amounts of TSE (Time Spent Editing).
As always, if you have any questions, just give us a call. Happy Scheduling.
Getting to Know Your Station by Analyzing Your Library publicado em July 30th, 2018
By Brian Wheeler
You had your rules perfectly set. Your categories were looking good, rotations were purring along, things were going nicely. But in recent days, things aren’t rotating quite like they were. Your well-oiled machine is now running like a misfiring jalopy. What could it be? It might be time to analyze your data.
Hearing Is Believing: Give Your Log A Listen Before You Send It publicado em July 16th, 2018
By Dave Tyler
I am glad you are here and reading our blogs. All of our blogs are written our staff who are long time radio pros, your colleagues, and there are a ton of great ideas here.
As programmers, we all schedule our music and then “massage” it – or check it out to fill any unscheduled positions and just give it a good once over to make sure tomorrow’s music will sound the way it should. Some programmers just schedule and send the log, while others will take an hour or more to look over every transition. I will say this up front, MusicMaster gives you all of the tools you could possibly need to basically schedule, check for any unscheduled positions, and send a great log. If your database is built well from the category level up through your clocks, grids and into well thought-out coding and rules, then there should be very little left to do after hitting “Auto-Schedule”. With all of that said, the prideful Programmer still wants to make sure he/she is sending the best product. I would like to suggest a great way to “Listen” to your log!
Before being able to listen to your log you are going to need to link your song cards to the actual audio. This can be done via Audio File Settings in Tools/Options. One of my compadres here at MusicMaster wrote a terrific blog on how to set up your audio.
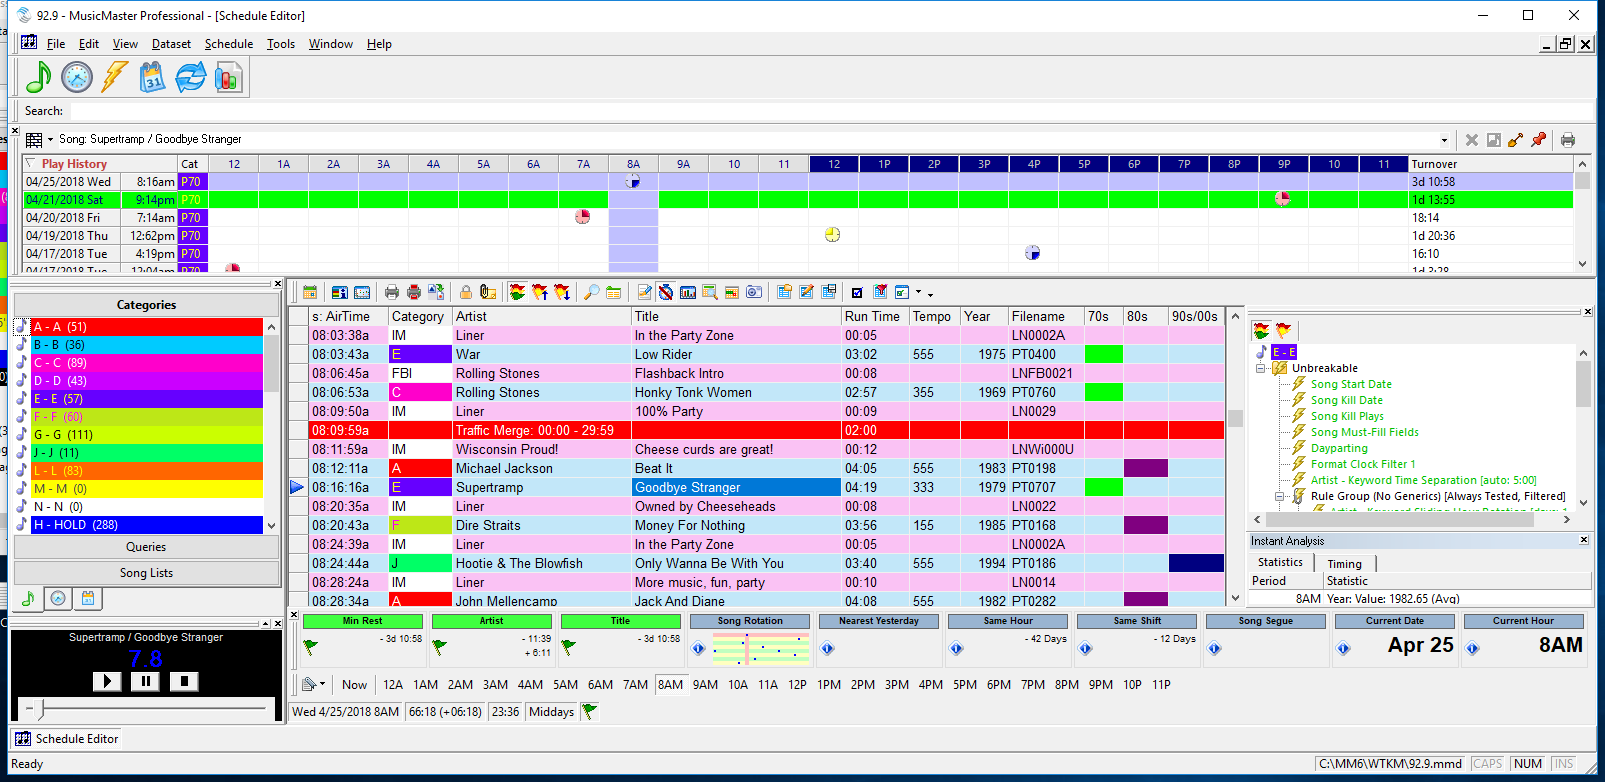
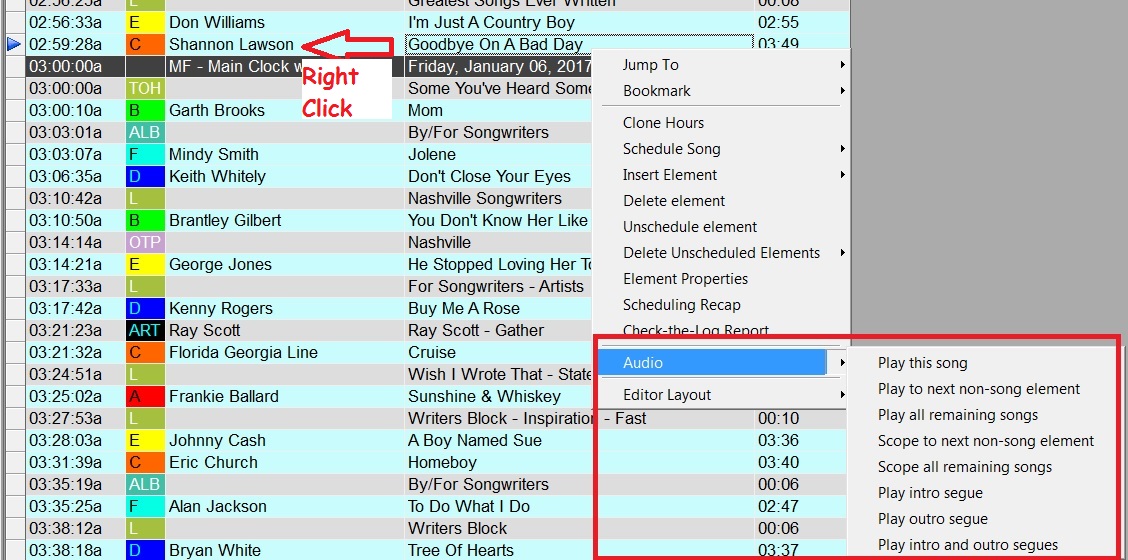
Once your Audio Files are setup, then you can open a scheduled log. In my example, I right click on Shannon Lawson, then select Audio, and I get a lot of different options as you can see below:
You may choose to play an entire song or play all remaining songs. One of my favorite tools here is to “Scope All Remaining Songs”. Using my example, if I were to choose this here, it would play the intro of Shannon’s song to the vocal then fade and play the end of the song followed by the TOH ID, and then the intro to Garth and so on. You could literally listen to your entire log in this “Scoped” fashion. There are several options for you to explore, but this is an innovative way to actually hear the flow and vibe of the day you scheduled.
There are so many cool tools for you to use in MusicMaster, so explore and find what works for you and if you need any help, any one of us on the Support team would be eager to help you.
What is your station’s actual format? publicado em July 2nd, 2018
By Jesus Rodriguez
Are you sure your station is the format you think it is? Whether it’s the genre in general that you play or how the different sub-genres play on your station, I’d like to take you through an exercise to so you understand exactly what your format at this moment.
I often get calls from users saying that they hear too much R&B on a Hip Hop station, the CHR station is playing too much Urban music, the bilingual station is playing more English music than average, the rock station sounds too alternative, etc. I usually get these calls the most right after music test results have been implemented or when there’s a wave of music shifting in the format. When I get a call saying “Jesus I just can’t have this playing so much, we aren’t that kind of format!”, rather than giving a verbal response, I show the user the facts. You can do the same.
I hear it all the time, “My station needs to be 50/50, 60/40, 70/30, etc.” If you ever question whether your station’s mood, tempo, amount of songs by an artist, sound codes, or just about anything is off (where you hear more of one over the others), there is a feature that will be helpful to you.
Right-click on any field and click on Library Analysis. You will get a window similar to this one below giving you the numbers for those items currently in your library view.
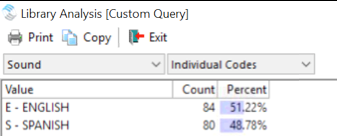
In the above example, I had a client that has a bilingual station that had to be 60/40 with Spanish as the dominant sound, and they felt that they weren’t getting that anymore. Well, I was able to break it to them that their library was closer to 50/50. For CHR stations that no longer hear so much pop, I might show them that actually, they’re more of an urban station because of the sudden influx of Drake, Rihanna, Post Malone, Kendrick Lamar, and others crossing over. The Hip Hop stations are more R&B because their tempo analysis shows that their hip-hop artists went soft with their new music. You can imagine how this could happen to just about any station format over time or after a music test. Either the charts are having you shift towards a different genre, or your listeners at your test just told you they prefer to listen to a different style than what you thought.
Now that you know how to run Library Analysis, you can also confirm what you get in the Schedule Editor as well. Everyone has their ideal percentage of how many types of songs should be in every hour so they can hit that 50/50, 60/40, 70/30, etc. The Schedule Analysis feature allows you to monitor this while you are in the Editor.
Check out this Schedule Analysis Blog by my colleague Paul Ziino called “Analyze Your Schedule”.
I hope this becomes an eye-opening experience that helps get your station back on course to the format you claim to be with your listeners. It does not mean that you have to remove any songs to find that balance, because I am sure you may still want to play those hits. You can tweak your rules to help prevent those specific types of songs from playing to close to each other making you sound like your competition or a different format altogether.
If you need any assistance with this please contact your MusicMaster support representative today.
Cloning Your Data publicado em June 11th, 2018
By Paul Ziino
You’ve been working hard. You’re thinking about your radio station all the time. You’re at dinner with friends, and you’re silently chewing on ideas for some new clocks. Instead of singing in the shower, you’re thinking about getting your imaging and music to sing together. At the movies, you’re not paying attention to the plot, instead you’re thinking about the pay raise you’ll get when your improved ratings come out after you implement all the changes you have in mind.
But there’s a problem. How do you get all those changes in place without screwing up what’s already on the air? The solution is to clone your database. This way you can make all those changes you’re thinking about, try them out off the air, and when you have it just right, switch to the clone!
It’s really very easy to clone your database in MusicMaster Pro. If you’re already in your data, go to File and Close Dataset. Now click File/Open Dataset, select the database you want to make a duplicate of and click “Clone.” You’ll be allowed to give the clone a new name at this point—maybe something like “Clone of Wxyz.”
When it’s all done, you have an exact duplicate of your database. That means the export design is still there, and your definition files will still work. Your library and clocks are all the same. Your layouts are just as you’re accustomed. Even your username and password are the same.
Now, get to work!
Did Someone Manually Schedule a Song? publicado em June 4th, 2018
By Jerry Butler
Are you wondering why a certain song scheduled that you don’t think it should have at that time? Quite often, the song was placed manually by someone and not automatically scheduled by MusicMaster. If you would like to see what items were manually placed in your log, MusicMaster makes it easy to see that information.
While in the log editor, click on modify editor layout. (Pencil and Paper Icon)

Scroll down and select Schedule: Manual field and move it over to selected fields and click OK.
I’ve put the Schedule: Manual field 2nd for this demonstration, so it’s easy to see which songs have been manually scheduled. The “M” signifies a manually placed element.
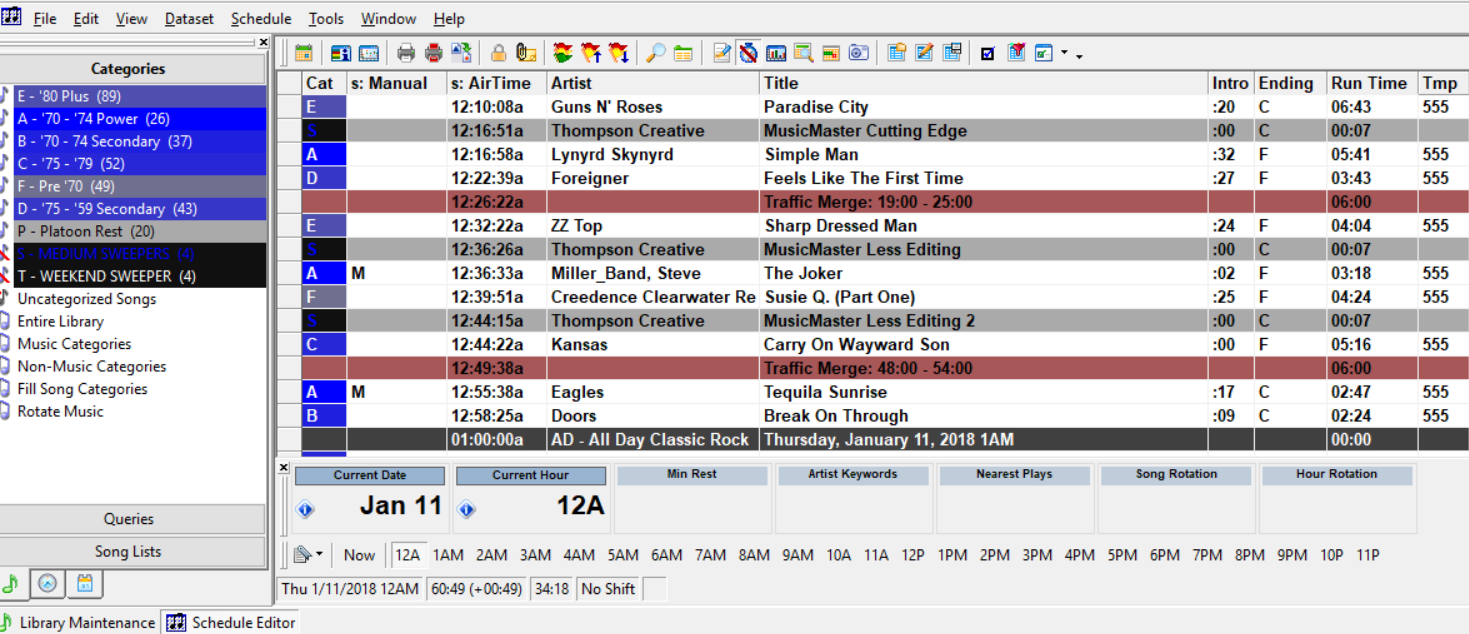
This is just one more way MusicMaster provides useful information to you while you are editing. Contact your Music Scheduling Consultant for more information and other tips to speed up your editing.
Custom Rules for Specialty Clocks publicado em May 21st, 2018
By Marianne Burkett
So, you have a 5’oclock Free Ride feature and you want specific rules to fit the hour.
You want no slow songs, no buzz killer songs, right? Just music that will pick up the spirits of those stuck in the car, in rush hour traffic.
With MusicMaster, if there’s a will there’s a way.
Let’s go to the Rule Tree and set up some custom rules for your 5pm clock(s)!
Go to: Dataset/Rule Tree or just click on the Lightning Bolt Icon. At the top right-hand side of the Rule Tree in Available Rule Types is the folder “Special Rule Tree Items”. Inside that folder is “Rule Group”.
Pull the Rule Group over to the Unbreakable All Categories folder. The Rule Group properties will open up once you’ve dropped it in the folder.
You only have a few clocks assigned to your 5pm hour so this will be quick.
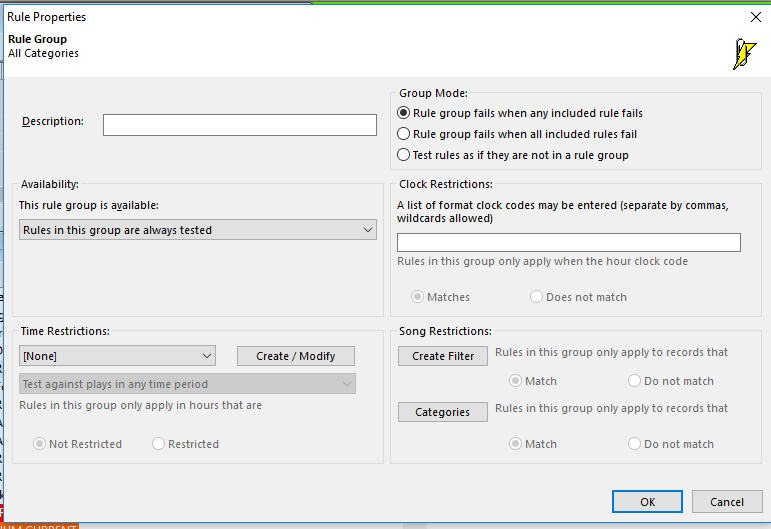
First fill out the “Description” field and give your rule group a name, then move over to “Group Mode” and select “Test Rules as if they’re not in a group”. (When you use the recap report, you’ll be able to see what rules in the rule group are failing or having difficulty if you chose this option.)
Next, go to the “Clock Restrictions” section and list the clocks you want to adhere to your specific set of rules for the specialty show. Be sure to separate the specific clock codes with a comma!

Click okay and your Rule Group is ready to fill up with specific rules for the show.
Drag and drop your rules over the title of the Rule Group and you should see the lightning bolt next to the rule, indent a bit. If the lightning bolt isn’t indented, it’s not yet in the rule group. If that’s the case, drag it over the name of the Rule Group and it should tuck in for you.
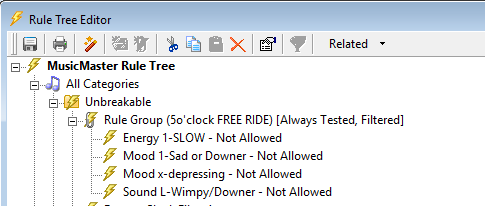
Save your Rule Tree and you are done! How easy was that?
The beauty of this is if your specialty show ever moves to a different time, the rules will just follow the clocks to the new time.
If you have any questions, please contact MusicMaster Support.