
MusicMaster Blog
Copy and Paste from Excel posté par Webmaster le March 13th, 2017
By Jerry Butler
MusicMaster has many shortcuts built in. Here are a few tips to make your library maintenance and editing even easier.
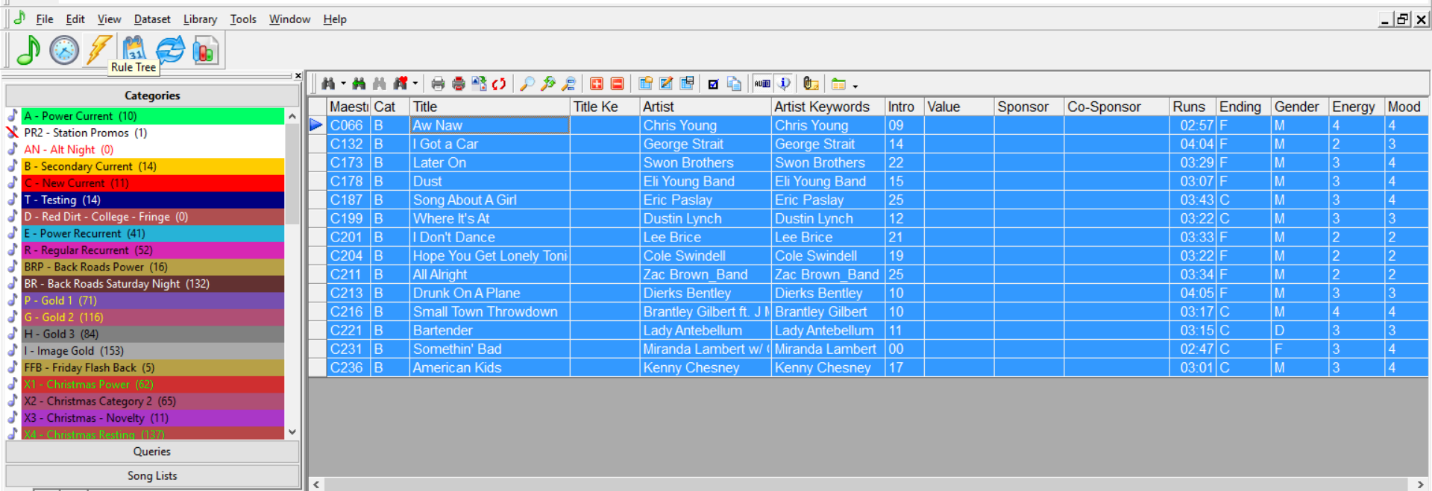
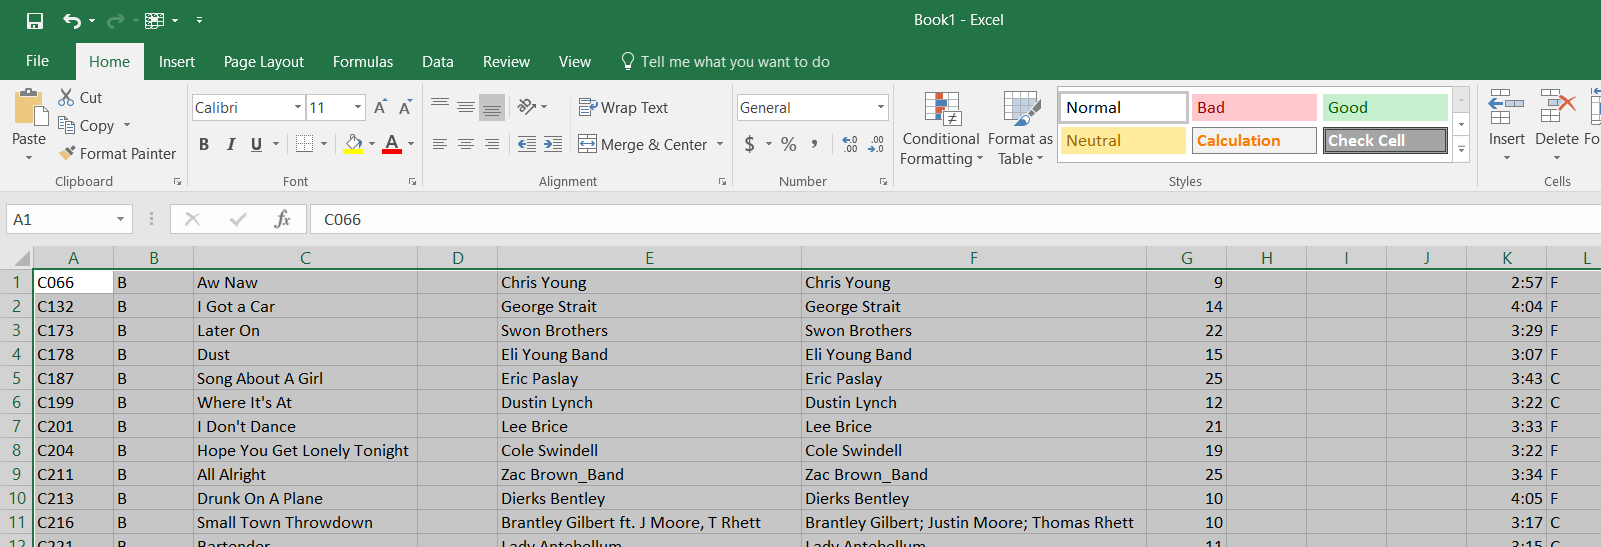
Did you know you can use some basic Windows shortcuts in MusicMaster? Would you like to copy your library or a category into Excel? Pull up the categories or groups you would like to copy into your library maintenance view, select all fields you would like to copy, use CTRL+C to copy and CTRL+V to paste into Excel.
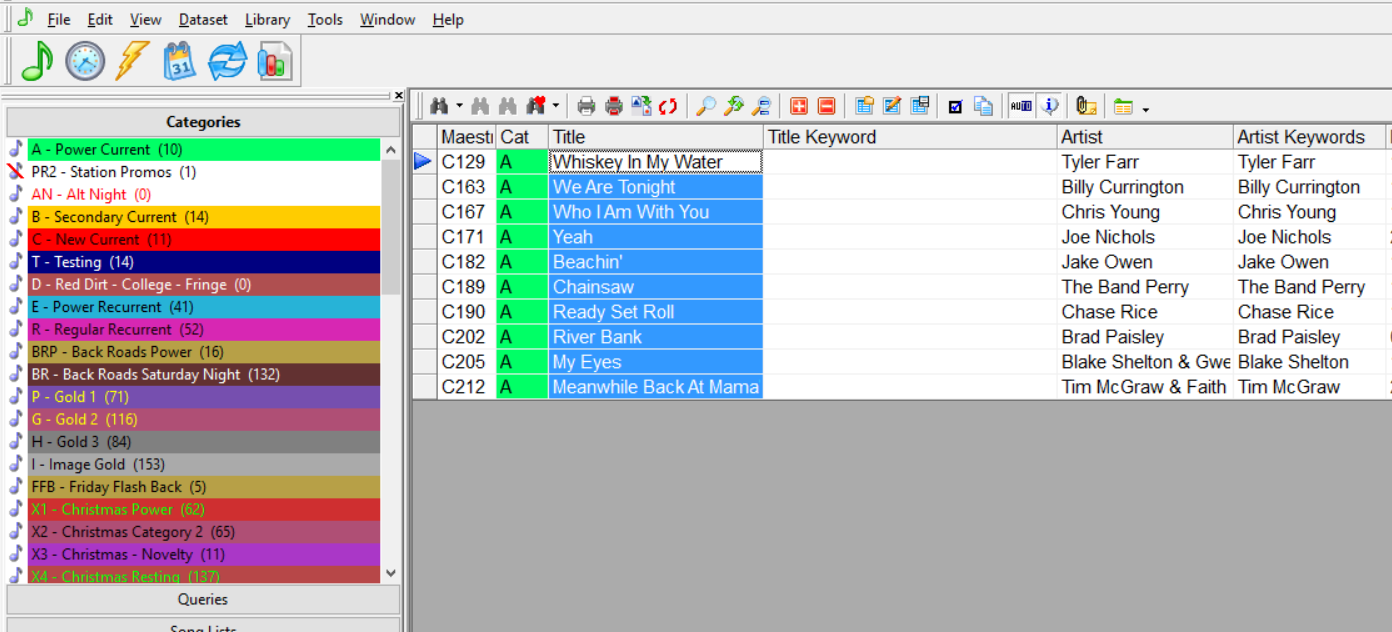
You can use this same feature to paste from one field to another in MusicMaster or add music directly from an Excel document into MusicMaster. This is often used when copying your title field over to your title keyword field. You can copy hundreds or even thousands of titles over in seconds compared to having to type out all those titles again.
When you are setting this up, make sure your fields line up the same way in both places. If the paste doesn’t go like you wanted, you can to Edit, Undo to remove it. It’s never a bad idea to make a backup of your data prior to any large data change.
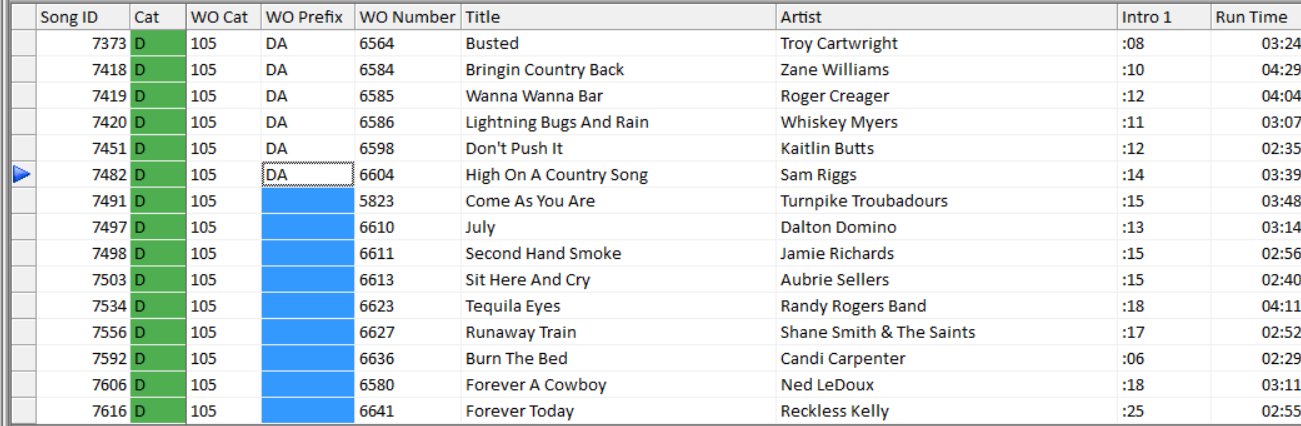
If you need to copy coding for new songs you add for your automation system categories, prefix or other fields, you can select the data that is correct in the field above and then select all fields needed below and use the CTRL-D to copy that same code to lines below.
These are just two of many shortcuts throughout the entire program. For a complete list of shortcuts in MusicMaster, click on Help and search shortcuts. Print them out and save yourself some time. Check out this blog article by Dave Tyler for more information on Custom Hot Keys too.
I Hate Typing Lognotes! posté par Webmaster le February 27th, 2017
By Dave Tyler
If creating clocks with Lognotes in them is driving you crazy well I’m with you! I am a Radio Programmer not a Computer Programmer! The last thing I want to do is sit down and type over and over cryptic letters and symbols like Matthew Broderick in War Games (Yeah, I still think that was a cool movie despite the fact that my cell phone now has more power than the computers in that movie did!). It is tiring and although every automation system has their own unique codes, delimiters and requirements to make the magic happen, if you dare leave out a comma or carrot”^” then the whole thing doesn’t work and to make things worse you clocks are filled with them!

I have some good news for shortcut lovers everywhere. In MusicMaster Version 5.0 and higher the process has been made much easier.
When building a new clock just click on the clock icon tab at the bottom of your Info Bar then select the “Lognotes” button and viola all of your lognotes are right there.
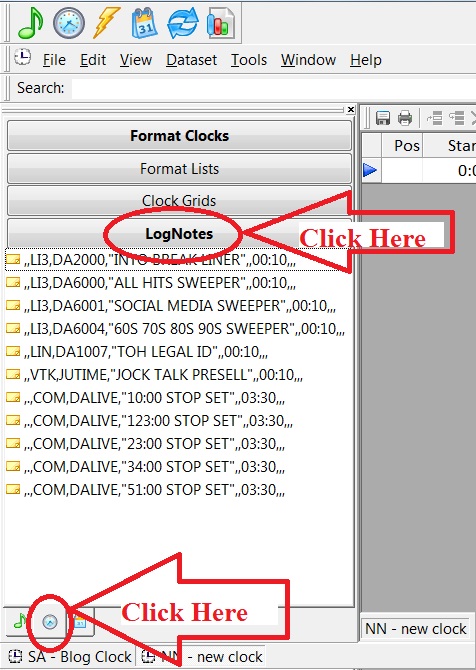
Now adding them to your clocks is easy. Find the lognote you need to use and drag it into your clock where you want it.
Create a lognote once and never type it again! This is especially useful when you have a lot of clocks that share the same lognotes for stopsets, liners, IDs, etc.
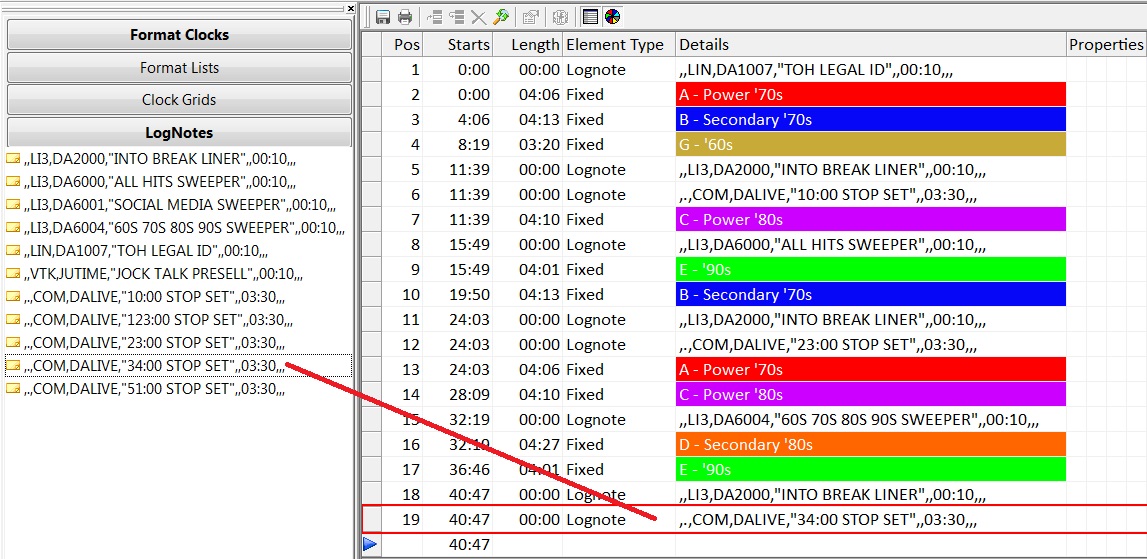
Two other benefits: With the entire list displayed, you may find another lognote that better suits your needs and it should be pretty easy to spot something that doesn’t look correct because the alignment is off. For instance, you can see in the above example that all the ,,COM,DALIVE lines look the same from line to line. If a comma was missing, it wouldn’t look that neat.
Drag and Drop, Copy and Paste are some of the wonderful, ease of use features you can take advantage of within MusicMaster. Save time and get back to programming your great radio station and crushing the competition.
If you have any questions, contact your MusicMaster Scheduling Consultant and we’ll be happy to answer your questions.
Artist Keyword Maintenance posté par Webmaster le February 13th, 2017
By Paul Ziino
I know we’ve talked about it before. However, I regularly am asked “why are my artists playing so close to themselves, but not indicating any rule violation?” In 90% of these cases, the issue is that the songs either have no Artist Keywords or have the wrong Artist Keywords.
Artist Keywords are what MusicMaster uses to keep the same artist apart from themselves.
Let’s use these examples:
BEATLES
THE BEATLES
BEATLES, THE
As far as MusicMaster is concerned, those are three unique keywords and thus they wouldn’t be separated.
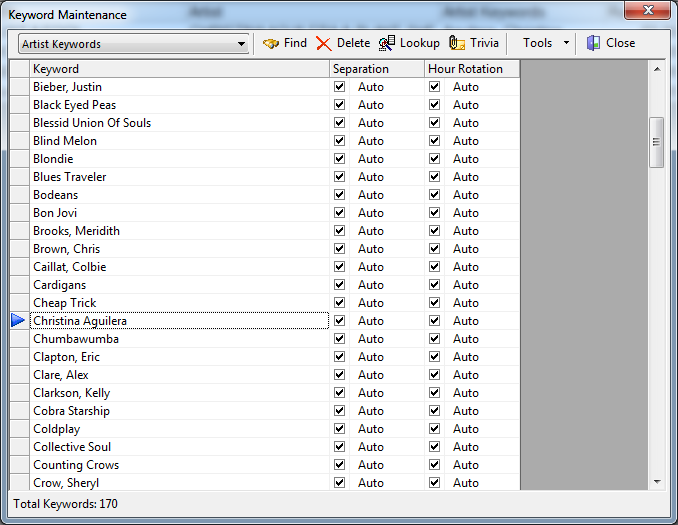
There is an easy way to clean these up. Go to Dataset/Library/Keywords, then select Artist Keywords in the dropdown. This is a list of all the Artist Keywords in the database. Any changes you make in this list immediately update throughout the database.
Below we see the keyword “Christina Aguilera.” If I wish to change it to “Aguilera, Christina,” just type right over the top of it.
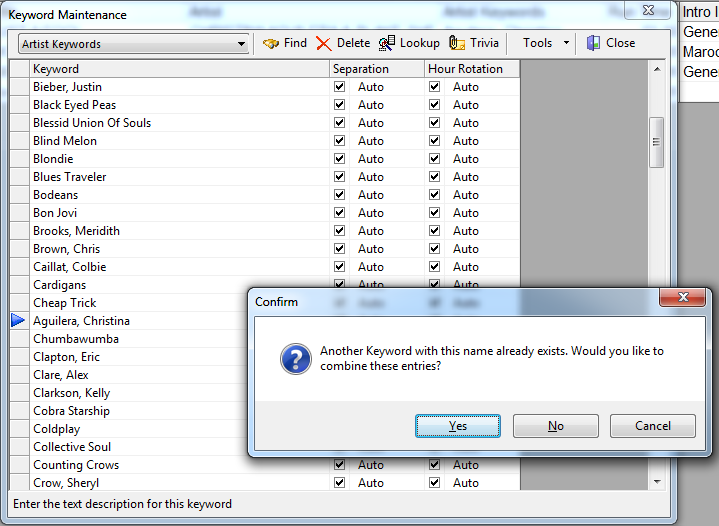
When I do, MusicMaster alerts me that there is another keyword listed that matches and asks if I’d like to combine them. I will click Yes, and now any song that had the “Christina Aguilera” keyword on it will be updated to the “Aguilera, Christina” keyword.
A quick suggestion: For groups, enter the keyword as the group’s name, “LED ZEPPELIN.” For solo artists enter the keyword last, first, “PLANT, ROBERT.” Now when you sort your library by artist keyword, it will appear as desired. Also, I suggest not including the leading “THE”, so just “BEATLES” or “WHO” or “EAGLES” and so on.
Once you’ve cleaned up your keywords you’ll notice that artist separation rules work better. When artist separation is working, your whole station will sound better because you’ll have the desired rest between plays of the same artist.
Custom Time Periods for Schedule Analysis and Special History Reports posté par Webmaster le January 30th, 2017
By Jesus Rodriguez
Recently clients have asked me if there was a way to make sure that they are always playing specific types of songs during certain parts of the day. As an example our friends to the North in Canada have to play a specific amount of Canadian content, some Latin countries face similar regulations, and other clients just want to make sure the hours aren’t leaning to urban, pop, rock, etc.
One great tool to help with this kind of stuff is the “Custom Time Period” which is found in Tools, Options, Database Options, then Custom Time Periods. Here you can set up to five different time periods that you can use for Schedule Analysis. These might also be used to calculate Special History reports.
Setting your Pass Order, Search Depths and Combining the Pass posté par Webmaster le January 16th, 2017
By Marianne Burkett
Since coming on board with MusicMaster in 2005 after years of being in radio as a programmer in various places, I thought I knew a lot about scheduling music.
In the past, I’d always set my pass order from Currents first to my larger gold categories last and set the search depth to 30% or so. Now, I’ve changed my tune. I still schedule my currents first by the session. A’s schedule, than B’s, C’s etc. Then I combine the pass order for my larger categories, plus I now use 100% search depth in my larger categories.
How do you combine categories into the same pass? Go to Dataset/Schedule/Scheduling Properties, put your cursor on the category you want to combine, hold down the shift key, and drag your category up or down the list using the blue arrow. When you let go, you’ll see the pass order combine.
It will look like this:
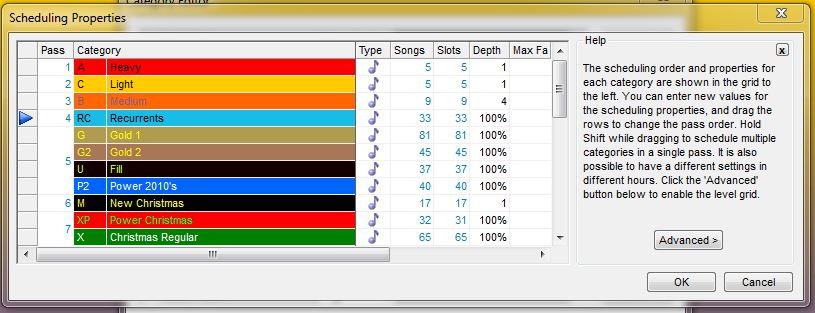
Heavy, Light and Medium all schedule one pass at a time. Notice Pass four contains Recurrents, Gold1 while Pass five contains Gold2, Fill and Power 2010s. Depending on your clocks, these categories build your hour in the order they are listed in each clock and move from the top of the hour to the end, then moving to the next hour.
Why is this a good thing? If you have a core artist in your currents or recurrents, the likelihood of that core artist scheduling from a category at the end of the pass order is pretty bleak. When you combine the pass order, MusicMaster schedules hour to hour with those combined categories and the core artists in your Gold categories have a far better chance of scheduling.
I also changed my search depth to 100% in the gold categories in the databases I work with. Initially, this also made me nervous, but my minimum rest settings in the unbreakable folder never fail, so there is really nothing to be nervous about.
When I tried these methods on a few formats I work in, not only did I get far fewer unscheduled positions, I got a better log and needed to make fewer edits.
It takes less time to do the logs when you allow MusicMaster to do the heavy lifting for you.
If you have any questions, contact your Music Scheduling Consultant.
Happy Scheduling!
Airplay Affidavits – Show Your Value with the Help of MusicMaster posté par Webmaster le January 2nd, 2017
By Jerry Butler
Most stations believe they have to run their promos, PSAs or underwriting through traffic to show value to the sponsors or charity. MusicMaster gives you the ability to run an airplay affidavit and show the value of your airtime.
Adding Category Info to the InfoBar posté par Webmaster le December 19th, 2016
By Dave Tyler
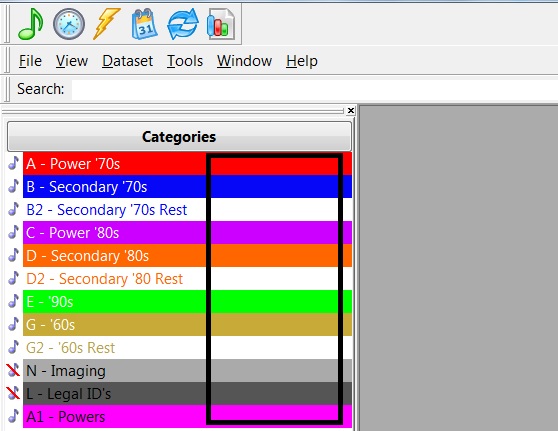
I will be the first to admit that I am a bit of an “Info-Geek”! I like having the tools I need and the information I need at my fingertips when I need it. MusicMaster has a couple displays that I now take for granted but when I run across a database that is not using them it drives me crazy! Over in your Info Bar where your categories live there is a big blank area…dead space that could, in my Info-Geek mind be filled with something useful to me.
Well if you are using MusicMaster 5.0 or later then you already can fill that space and you have 3 options to choose from Song Count, Average Run Time & Slot Count.
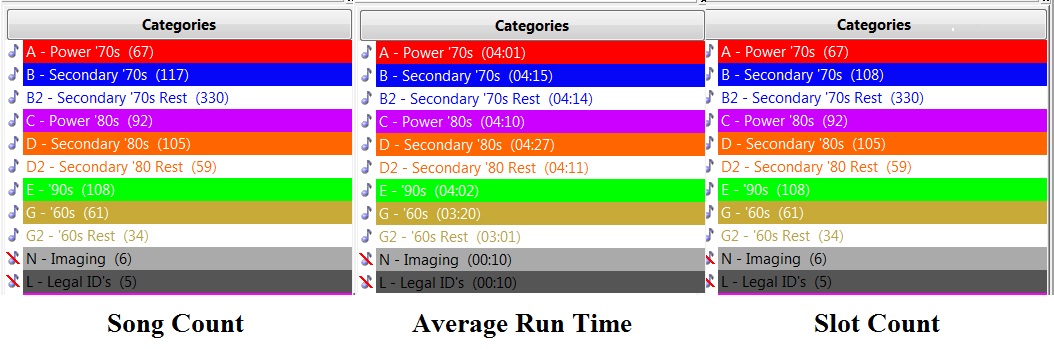
These options are pretty straight forward. Song Count is literally how many songs are in that category. Average Run Time is just that, the average length of the songs within that particular category. Finally Slot Count denotes how many “Slots” are in that particular category. Slot Count can be important to you if you use a lot of packets. You will note in the above example in Category B there are 117 songs in the category (Song Count) but only 108 Slots (Slot Count) because 9 of those songs are packeted in some form or another. These option give you a quick reference to information that may be specifically important to you.
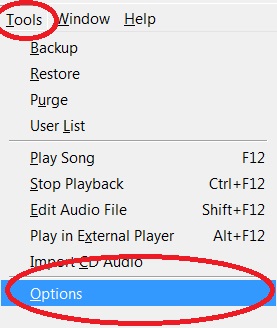
Ok so now I’ve shown something cool now let me show you how to make the magic happen in your Info Bar. Start by going to Tools/Options.
Then go to Library Editor Options and you will see the drop down box with your available options below the heading of “Show Extra Category Information”.
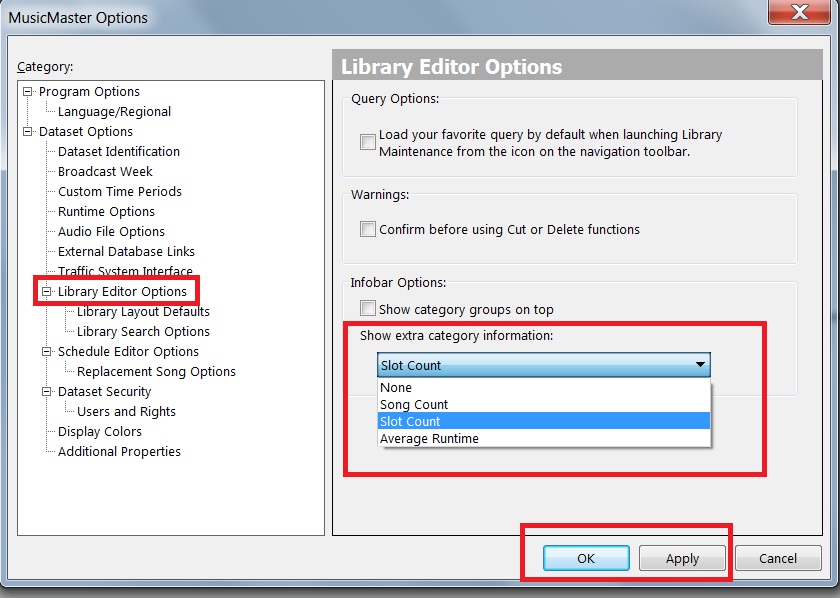
Choose which one of these will be of the most value to you, click Apply then OK and it is done! This additional information is just another great function of MusicMaster that puts the important information you need at your fingertips.
To find out about other time saving functions, if you have any questions or are on an earlier version and want to upgrade your version of MusicMaster to have access to these wonderful features contact your MusicMaster Music Scheduling Consultant.